How to Make a Rainbow Cake
There are a couple of cakes that I make that the kids go crazy over. This rainbow cake it one of them!
I made it for the first time when Nick and Luke turned 4.
Let me show you how we make this. I don’t want to discourage you when I say it is messy and time-consuming, but I just want, to be honest. Nonetheless, it is an amazing time to make memories together and it is a great opportunity for homeschooling because there are some math and life skills that go into this cake. Plus, who does not love a rainbow!

Here is the year they turned 4 and we made this cake. I know it’s not a large picture and it is not one you will likely see on Pinterest, but it is our memory. My sweet babies are not babies anymore.

Ingredients:
- 2 boxes of white cake mix
- ingredients on the back of the box for the cake mix
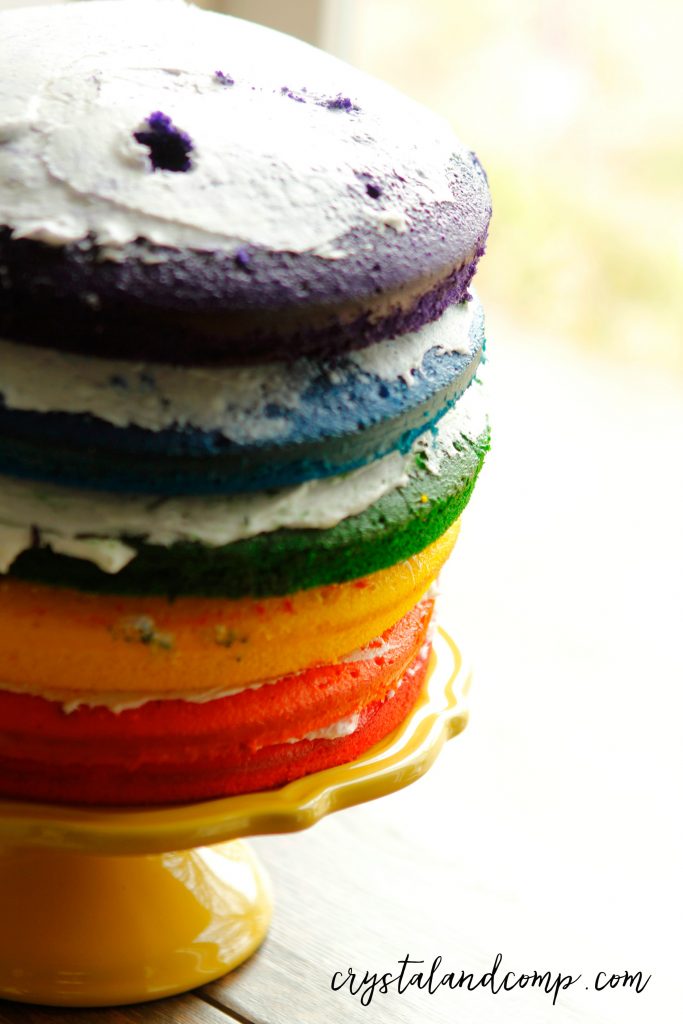
- 1 box of multi-color icing dye (you will use ROYGBV)
- 1 batch of homemade buttercream icing (or you can buy this)
- 3 round cake pans (6 if you want to buy that many) just make sure they are all the same size
- 1 pkg of cake wooden dowels
- 1 bag of small marshmallows
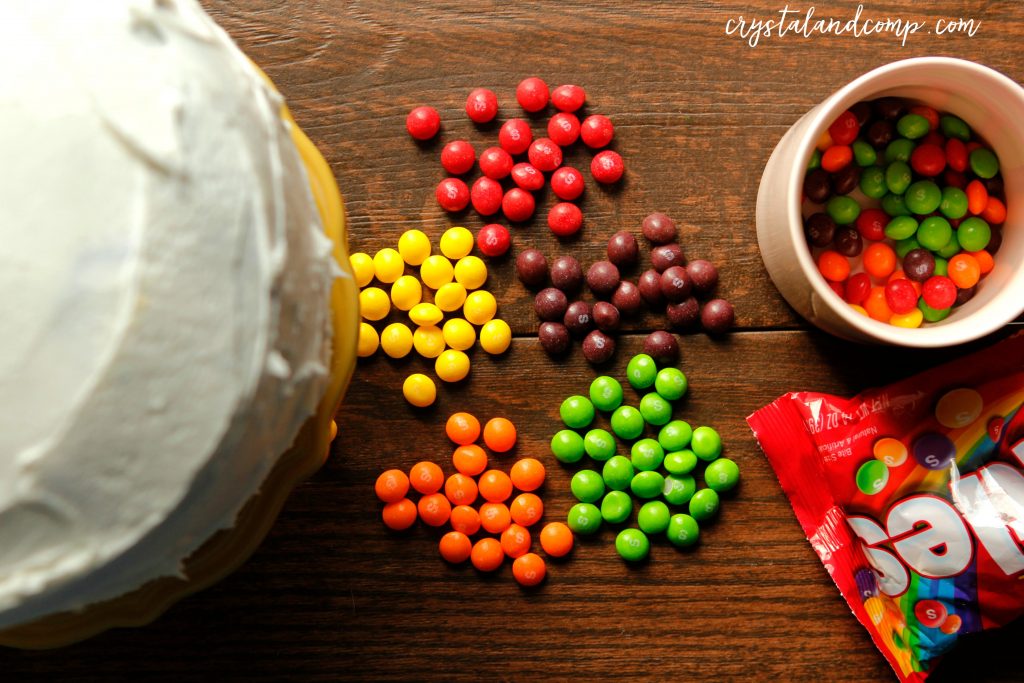
- 1 large bag of Skittles
- 1 roll of Bounty paper towels (trust me, you will need them)
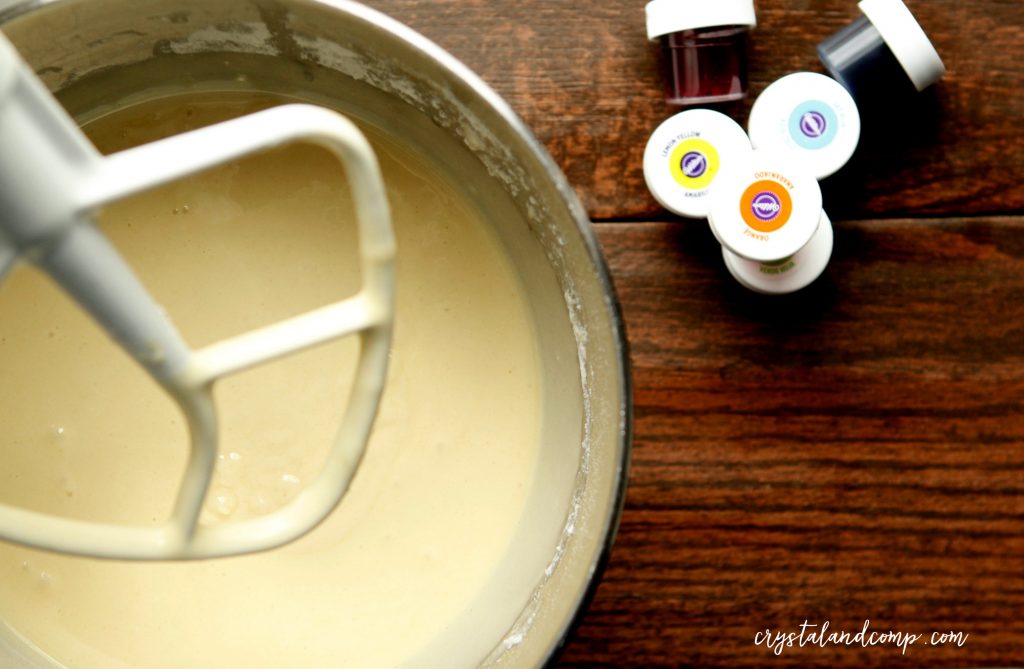
In a standing mixer, mix up the two boxes of white cake mix following the instructions on the back of the box using the listed ingredients (water, oil and egg, usually).
Once the cake mix is mixed well, divide the mixture up into six smaller bowls. We did about 1 and 3/4 cup of cake mix per bowl.

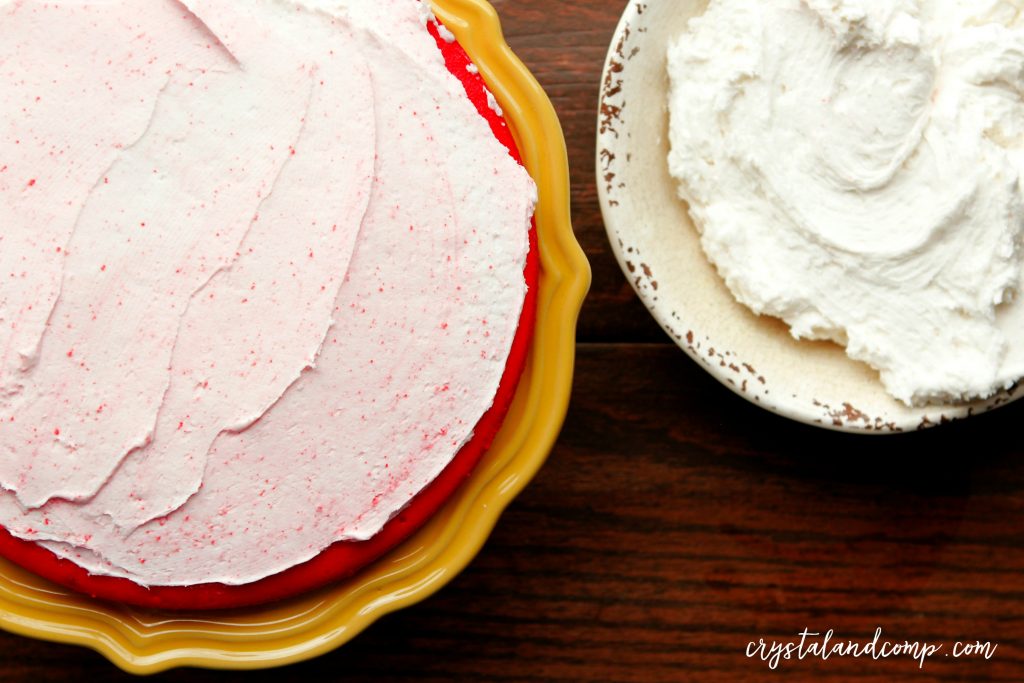
Once I have iced it I like to use a wet Bounty paper towel and wipe the edge of the cake plate to make it clean and pretty.

Next, separate out your Skittles by color.
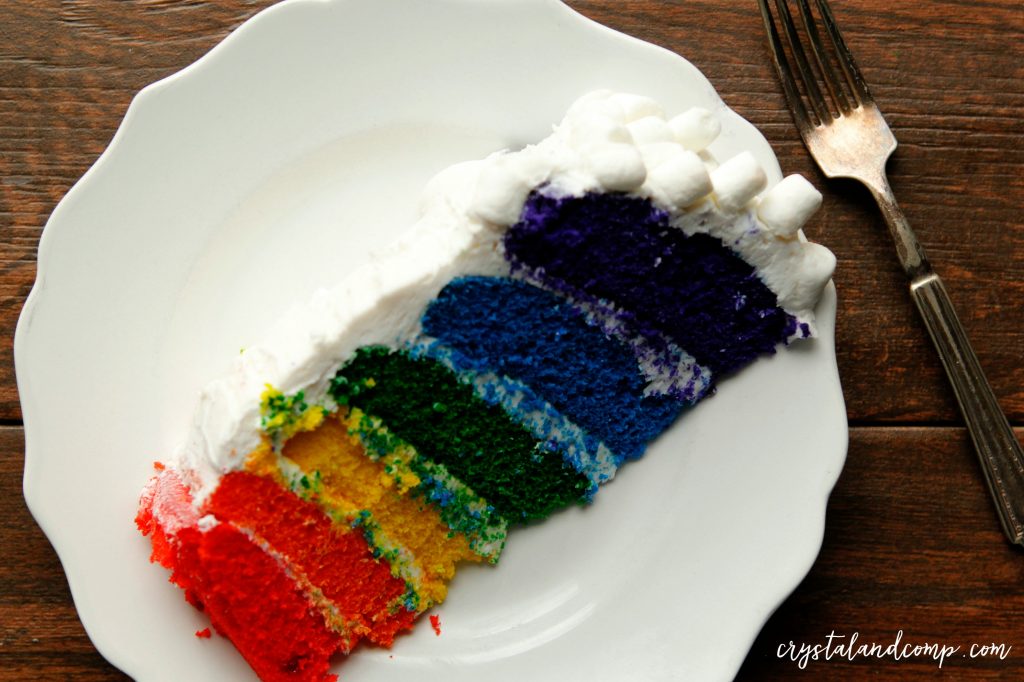
Then add them in the shape of a rainbow on top and use small marshmallows to make the shape of clouds underneath.
Is this not the most adorable and fun cake ever?!?!

Here is the one I made on their 4th birthday. I added Skittles around the top and bottom as well.

It’s the cake that brings a smile to everyone’s face!!

Here is the one I made way back in 2010. This one goes from red to purple instead od purple to red when you cut into. Honestly, the kids don’t care either way!

Enjoy… then prepare yourself for an adult sugar coma and stomach ache as your children rage in hyperactivity and bounce off the walls.
Totally the best birthday cake EVER! (But I already said that.)
This post is sponsored by Bounty. All opinions are my own.
Now THAT is a super cool birthday cake!
Wow! I'll have to try that soon (can't wait for a birthday since ours are all in the winter)
I came over from WFMW
Erica
I would love that cake for Simon's birthday July 28……wow, that is beautiful.
Christine
Housegame@aol.com
the more I look at the more I want to take a huge bite out of it.
Christine
housegame@aol.com
That has got to be the coolest cake that I've ever seen!!! Thank you so much for sharing it with all of us.
Blessings to you,
Sue 🙂
WFMW
Oh, wow! How cool is that?! Love it!
Holy Moly…now THAT is a cake!!!
How many cake mixes did you need? I think I need to make this 🙂
I kinda sorta really want one!
Oh my gosh, I see a stomach ache coming on. What a great idea! Sue
Love Love Love the cake!
wow, pretty intense! Must have taken forever but I am sure the boys LOVED it!
Erin- it is 2 white cake mixes… really pretty easy.
Every time I look at the rainbow cake I get hungry. I want this cake so bad. My sons birthday is the 28 July and my grandsons aug 8….it's so pretty.
christine
housegame@aol.com
I would like to exchange links with your site http://www.blogger.com
Is this possible?
That is the most magical cake EVER! Reminds me of my Rainbow Bright watching days – did you watch that show?? 🙂
I would love to feature this during my month of St. Patrick's Ideas if you don't mind! ??
Happy Home Fairy-
I loved Rainbow Bright as a kid! Loved her!
Please, share! I would love that.
Thanks for stopping by. 🙂
I'm bookmarking this! My daughter has a b-day coming up and she would LOVE this!! Visiting from The Girl Creative linky!
So adorable! I can't wait to make one of these for my little girl. I love it!
Stop by and see what we're making at our house…
SunScholars.blogspot.com
Oh holy cow! That is just plain awesome! I'm visiting from Tip Junkie and so glad to find your blog! Thanks so much for such a fun post…can't wait to try out this SUPER FUN cake! 🙂
We made this cake for my DD's 3rd birthday (2 years ago). But we decorated it subtly on the outside so everyone was totally shocked when we cut into it. I LOVE how you used the rainbow skittles on the outside. We've been thinking of making it again…just for fun. These would be a great colorful addition:)
*Visiting from TipJunkie
XO,
Sarah
HandbagsnPigtails.blogspot.com
AMAZING Beautiful CAKE!!! I think even my 17 year old TWINS would love this cake!
We would LOVE for you to come over to THIS WEEK'S CRAVINGS and link it up! This week our theme is KID-FRIENDLY and every kid (big or small) would LOVE this! Please come on over and link up!
http://momscrazycooking.blogspot.com/2011/02/this-weeks-cravings-18-kid-friendly-and.html
This is a great cake. My daughter would love it. I shared your post with my readers today: http://pinkiefae.blogspot.com/2011/03/pinkies-picks-march-1-2011.html
Love this rainbow cake! I think I will go around the neighborhood and borrow some baking pans 🙂 I only 1 round pan. Thank you for sharing the tutorial!