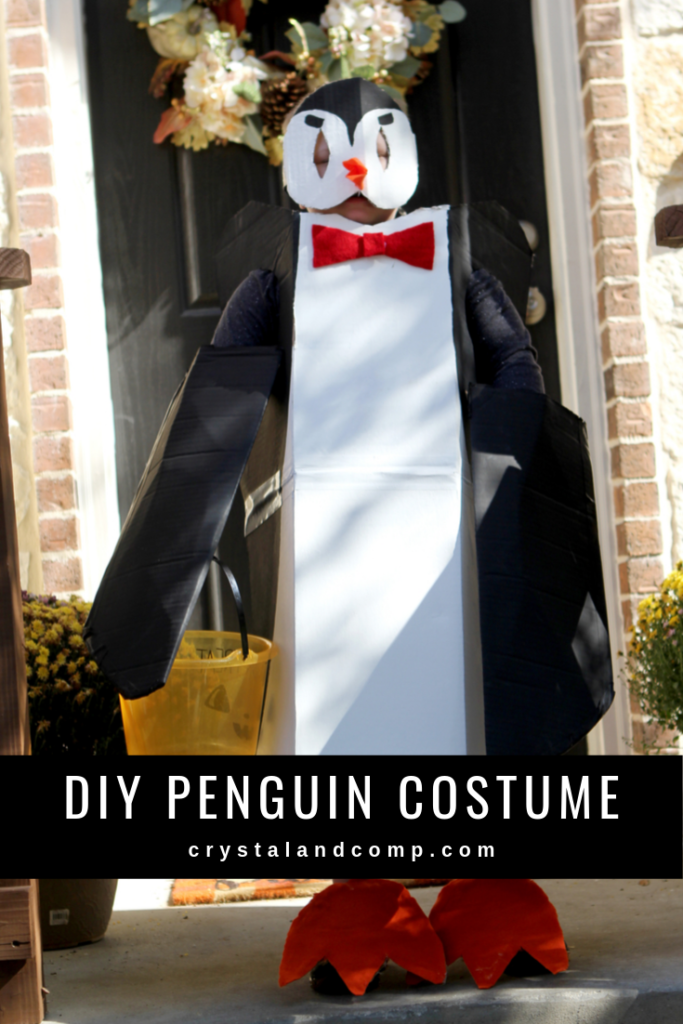
DIY Penguin Costume
We have been making DIY Halloween Costumes at our house for years. My husband and I love joining ideas together to come up with creative and super fun plan.
One of the most popular costume searches on my site for kids is for a penguin.
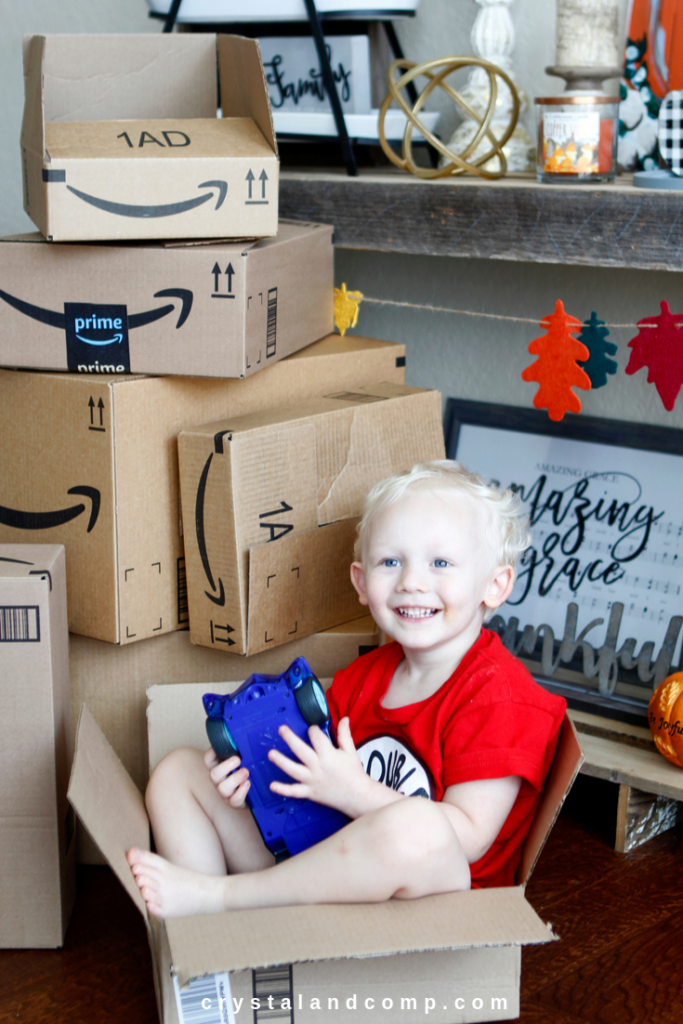
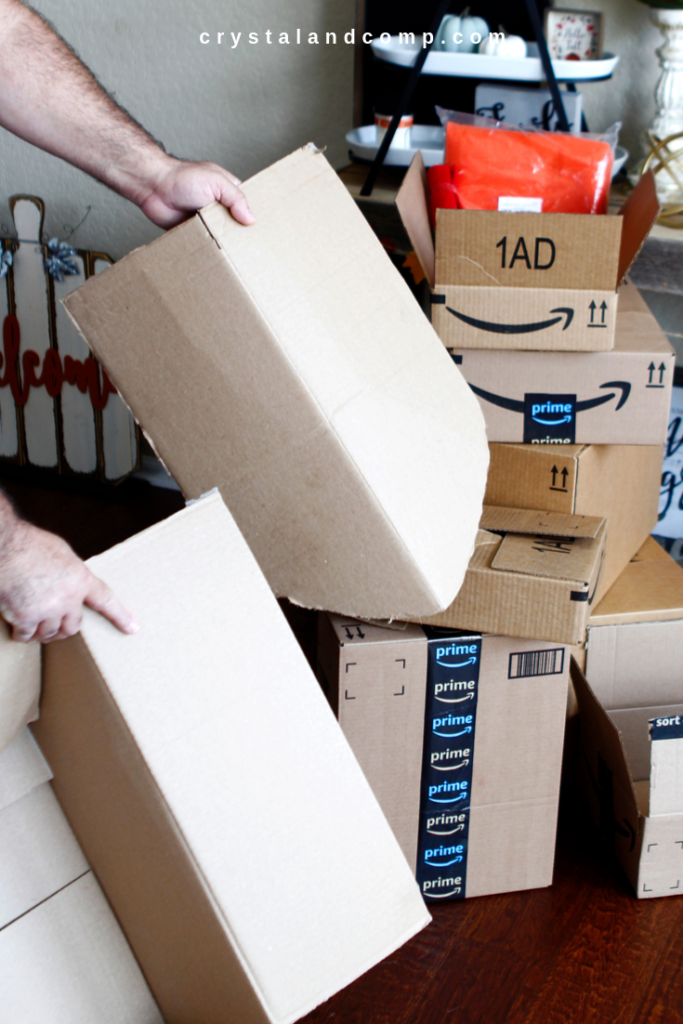
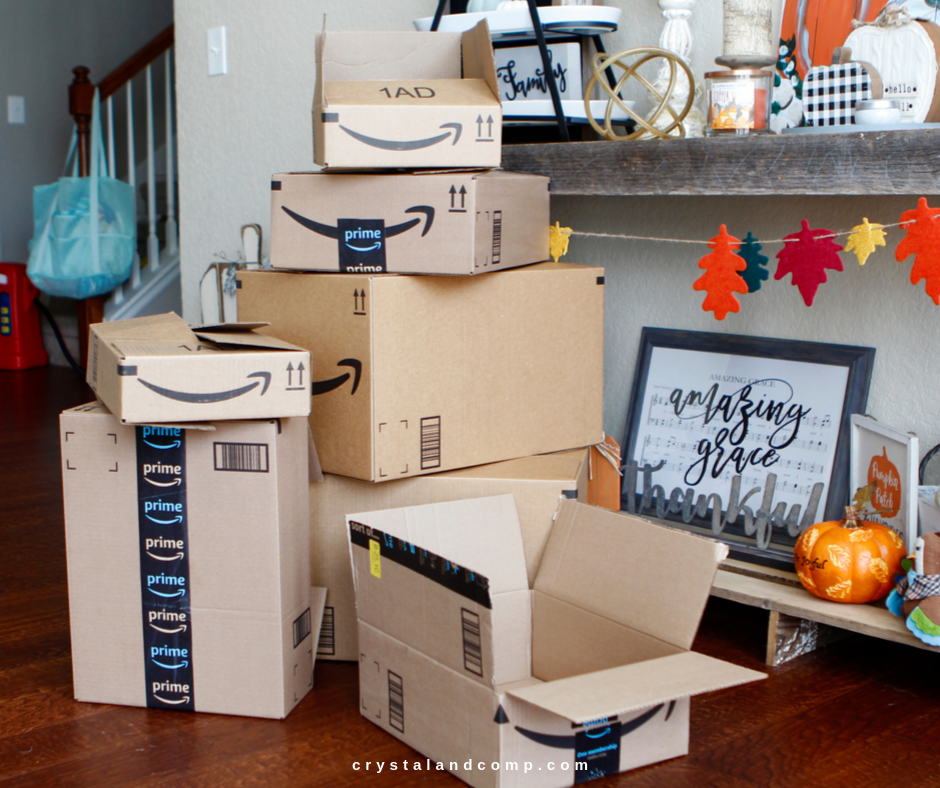
This weekend we made the cutest DIY penguin costume using recycled Amazon smile boxes. If you’re anything like me you get Amazon Prime deliveries multiple times a week! “Boxtumes” (where cardboard boxes and Halloween costumes collide) are the perfect way to repurpose Amazon smile boxes!
This Halloween costume is so easy to make. All you need are a few items, which you likely already have on hand.
We’ve been holing on to our “smile boxes” for a couple of weeks.
There are so many homemade halloween costume possibilities with these!
Let me show you how easy it is to make this penguin.
Supplies for Penguin DIY Costume
- 1-2 medium- large, empty Amazon smile boxes (this is going to depend on the size of your child)
- scissors
- orange felt
- red felt
- craft knife
- pencil
- black duct tape
- hot glue gun
- glue gun sticks
- black acrylic paint
- white acrylic paint
- paint brushes that can be used with acrylic paint
How to Make a Penguin Costume for a Child
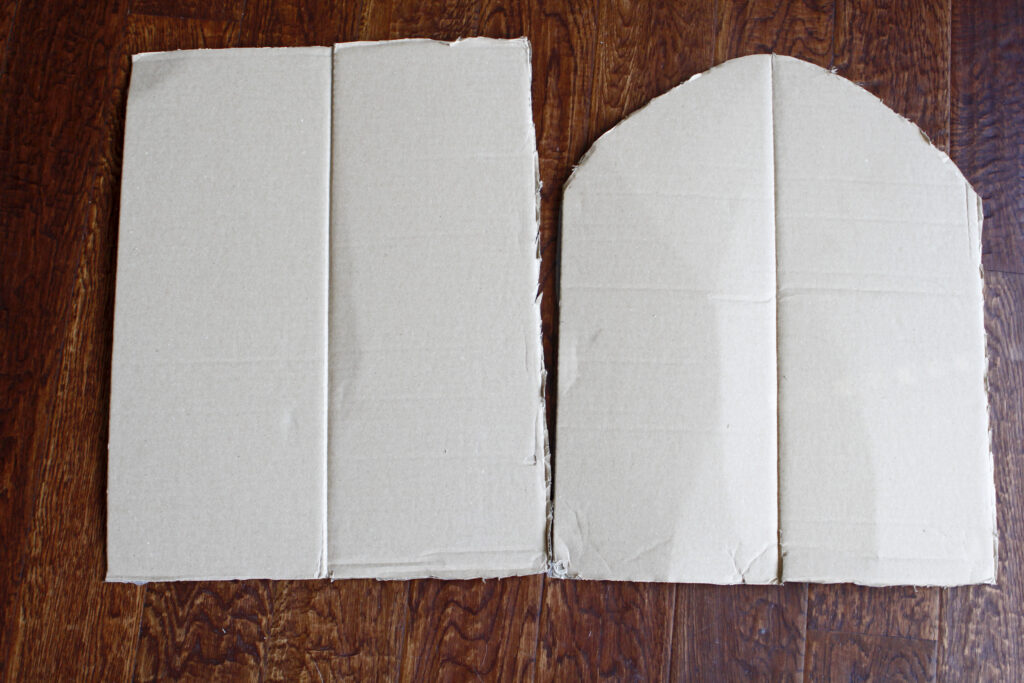
Grab a large empty Amazon smile box and break three folded sections open just like the picture below.
Turn the box long ways just like we did in the photograph.
The length of the box needs to be just about 3 inches shorter than the height of the child from under the neck to their feet. You can always shorten the box.
The great thing about homemade costumes like this is you can adjust as needed and modify for the age and size of your child.
Notice we have made 2 medium size circles where the child’s arms will slide through. Use a craft knife to cut those circles out.
Also, along the top of the box trace out an area where you will cut the box so it lines up comfortable with the child’s neckline. You can see the faint pencil lines at the top of our box in our image below. Cut the “neckline” area out with scissors.
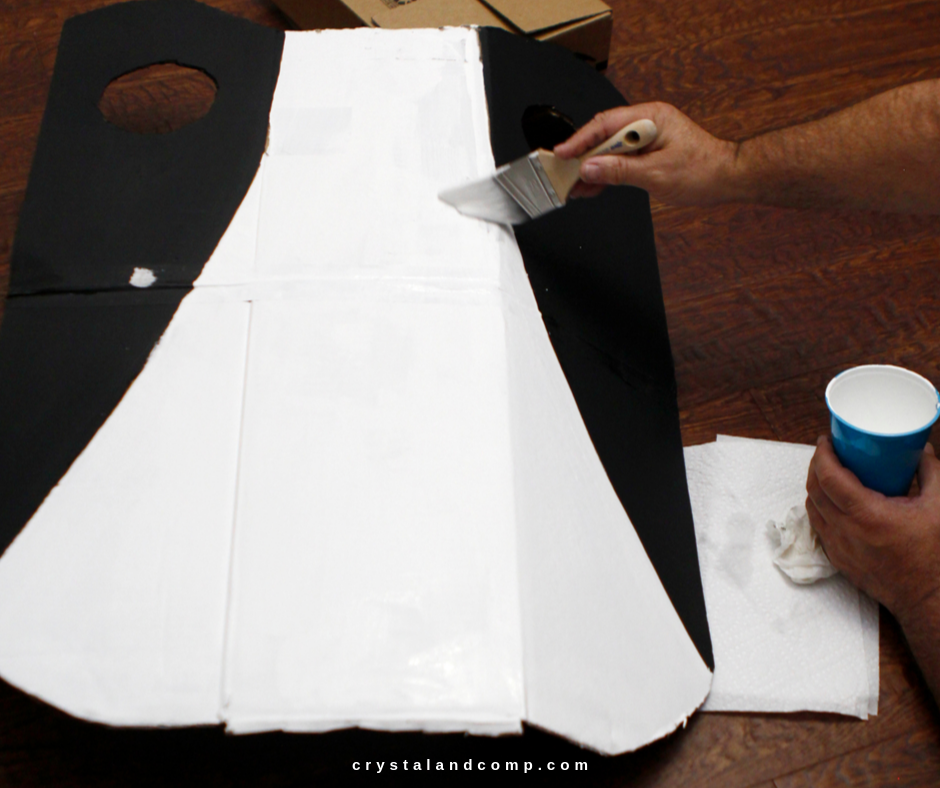
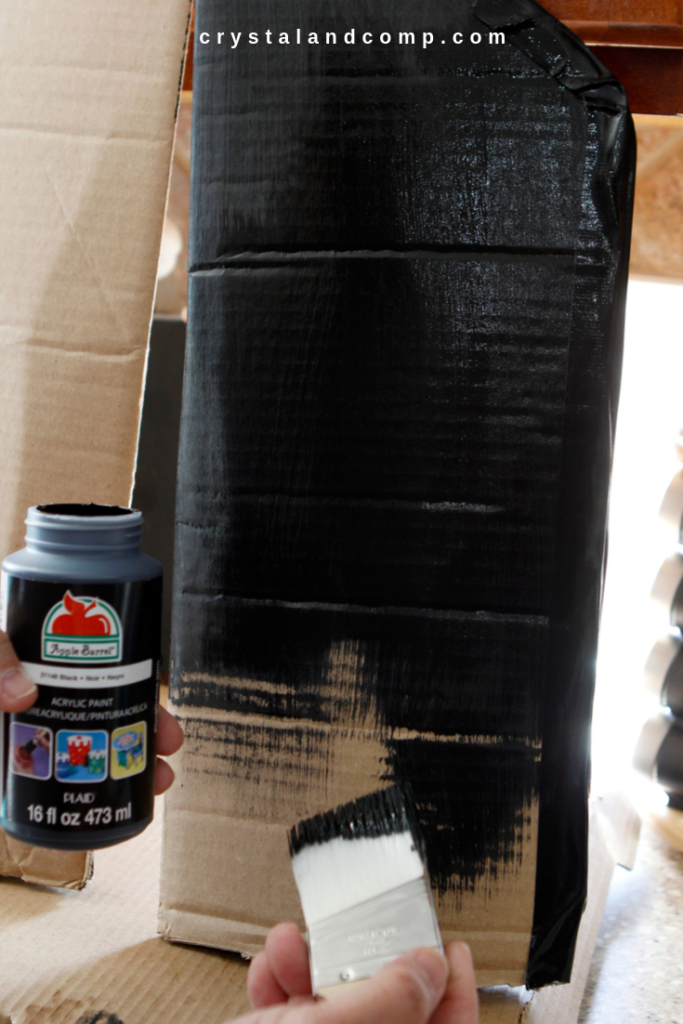
Don’t worry about any tape that is showing. We are going to cover that with paint.
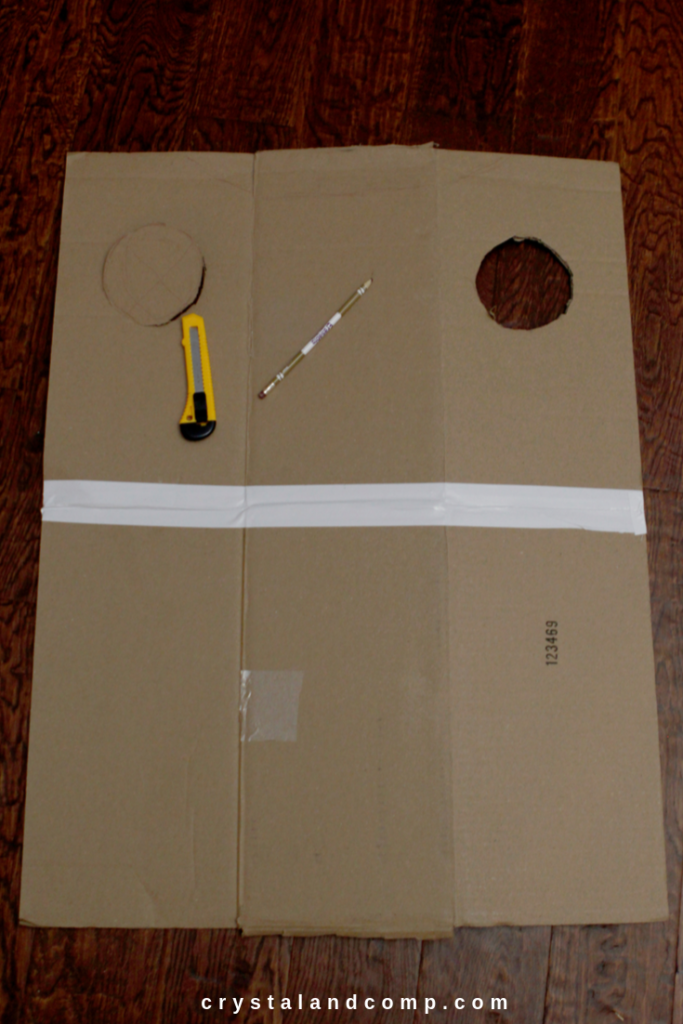
Along the bottom of the box you will cut the to curve the edges and remove any length you need gone.
Remember, the curved edges will give the rounded shape of the penguin, so keep that in mind as you trim.
Begin to paint using the black and white acrylic paints following the image below as a pattern. The paint should widen as you go down the box to give shape to the penguin.
Let it dry completely using a blow dryer if needed to speed things up.
Now, let’s make the penguin wings for our costume.
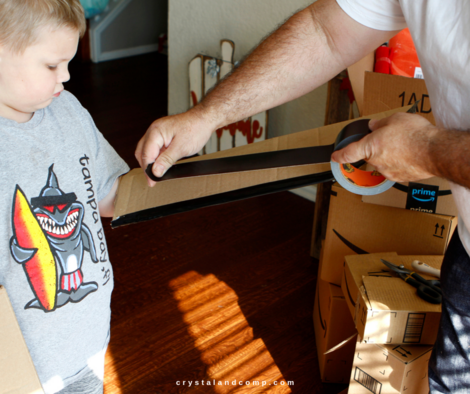
See how we took a folded section of the box below. It’s one side of the box body and one side that is the box lid- they join together with the crease. You want to cut that section of the box off like we did in the image below.
Do this twice so you have what you need to make two wings.
Then you’re going to use scissors to cut and curve one end of each so it resembles the image below.
When folded in half where the creases are, these are going to slide over the child’s arms like a sleeve.
Use black duct tape to “seal” and close up the open edges once it is folded over the child arm.
This is what they will look like once sealed with the duct tape leaving the bottom open for the arm to go in and out. Notice there is not duct tape at the bottom.
Now they are ready to paint.
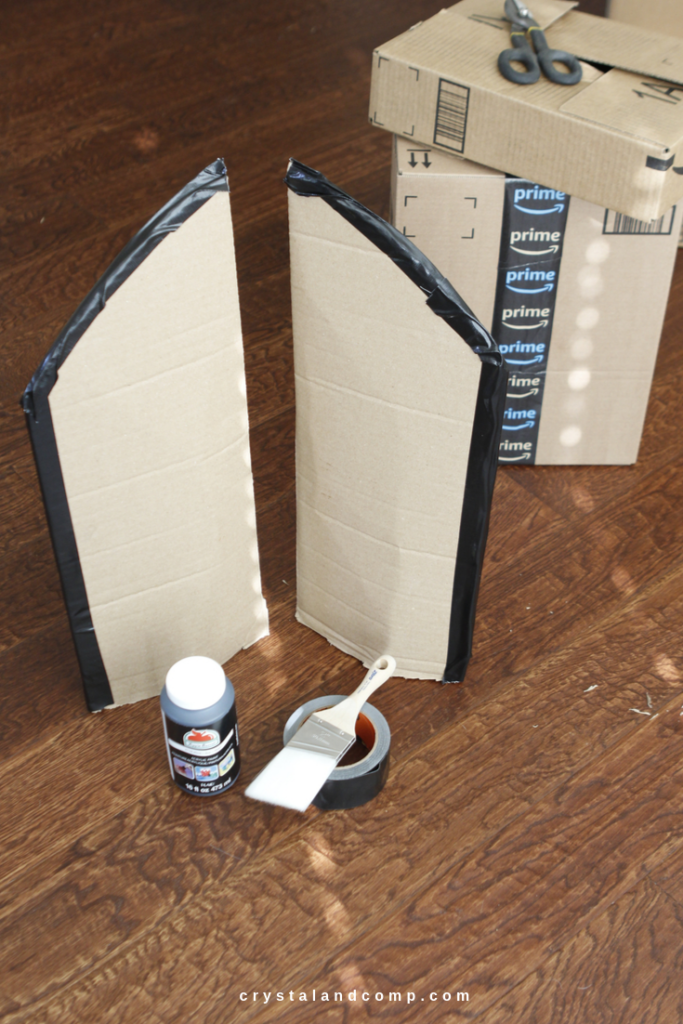
Use a paint brush and paint the front and back of each cardboard penguin wing with black acrylic paint.
Set them in a safe place to dry completely. Again, you can use a hairdryer if you need to speed up the process.
While that is drying let’s make the penguin face for our costume.
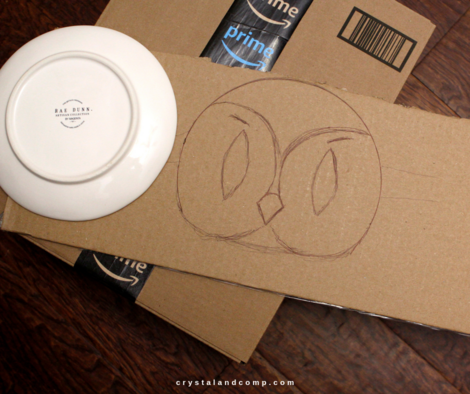
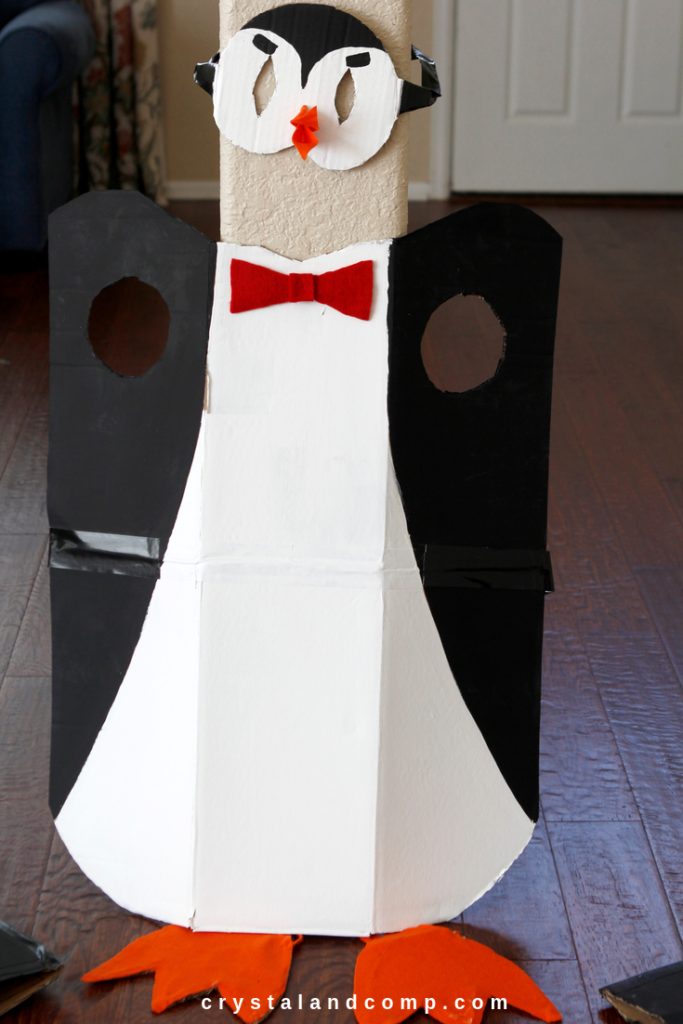
We used a small salad size plate and as a template to trace for a perfect circle on another piece of cardboard. If you can eyeball it, go for it.
Then my husband (who is so much craftier at free handing than I am) drew large circles for the eyes, leaving a bit of space in between them. See that below?
He made large stretched out oval shaped eyes with pointed ends.
He drew in a place for eyebrows and a place for the beak.
He also added some “straps” to the side to make a true mask like look.
You can follow our drawing below.
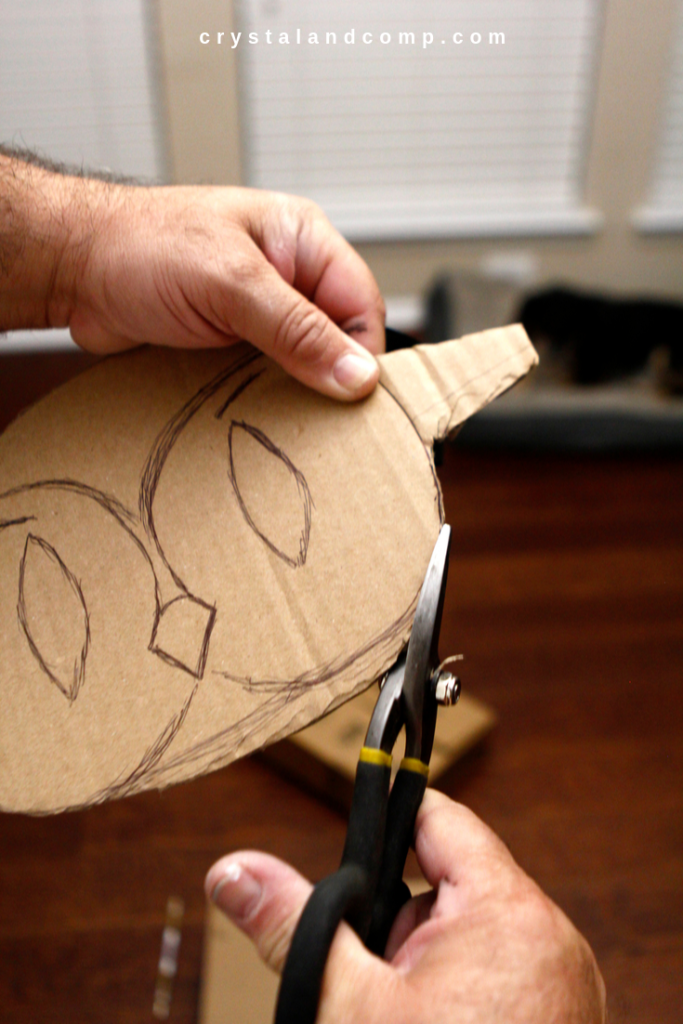
Cut the mask out. Also cut out the pointed ovals too so your little one can see out of the mask.
You will see in the picture below the straps are short. We will lengthen them with duct tape so it can tie behind the back of your child’s head.
See the duct tape straps we added to the sides? Duct tape is so stinking handy and versatile.

Use the white and black acrylic paint to paint in the mask.
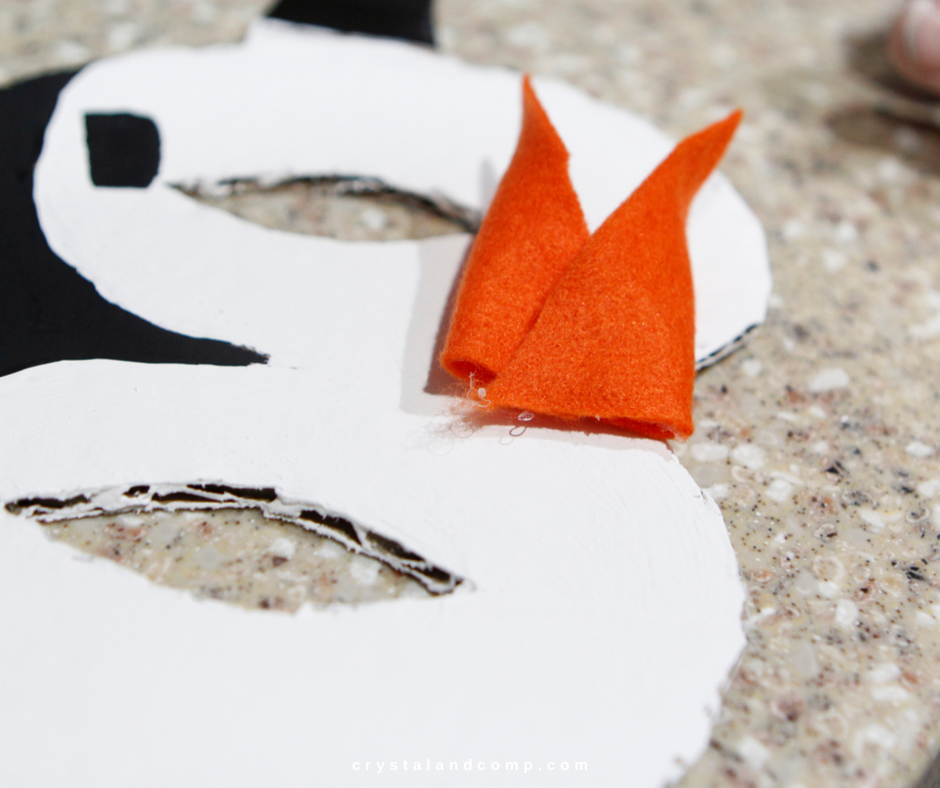
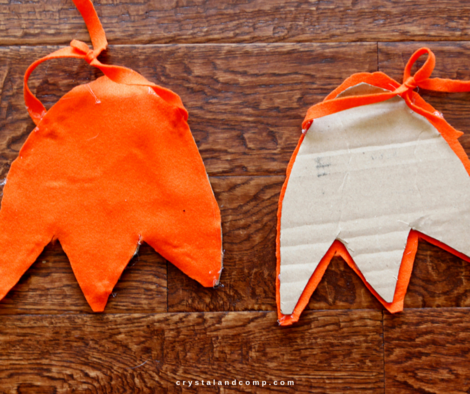
Grab some orange felt and cut out two equal side triangles.
Use a hot glue gun to connect the triangles together to form a beak. Hot glue the beak onto the mask.
Use another piece of the cardboard box to cutout two penguin-like feet using orange felt. Just free hand them to resemble what we have below.
Use the cardboard as a template to trace and cut orange felt in the foot shape.
Hot glue the orange felt to the cardboard as we did in the pictures.
Cut long skinny strips from the orange felt and hot glue them to the back of the feet as we did in the image below.
These straps are going to allow you to tie the penguin feet onto your child over the tops of their shoes.
Once the penguin box is dry, hot glue a red bow tie to the box at the top of the penguins neck area using red felt.
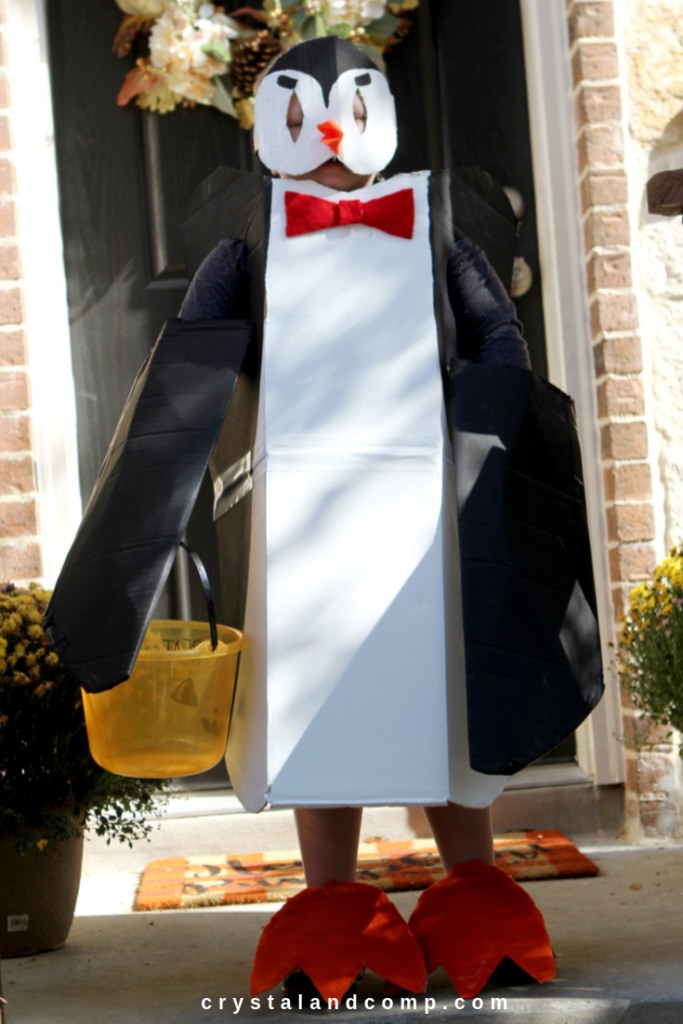
Once everything is dry here is what the costume looks like completed.
 Now it’s time to dress your child in the DIY costume.
Our 5 year old will wear this one. I put a pair of shorts on him since the cardboard box will cover his legs.
I put a black long sleeves shirt on him so the shirt covers any gaps that he has once the “wing sleeves” are on.
Slide the body of the penguin onto your child.
Slide the cardboard wings onto his arms.
I did end up cutting out a small circle on the inside of one of the wings so his hand would poke through allowing him to hold his Halloween bucket.
Tie the mask on.
Tie the feet on over his shoes.
And we have a penguin costume!
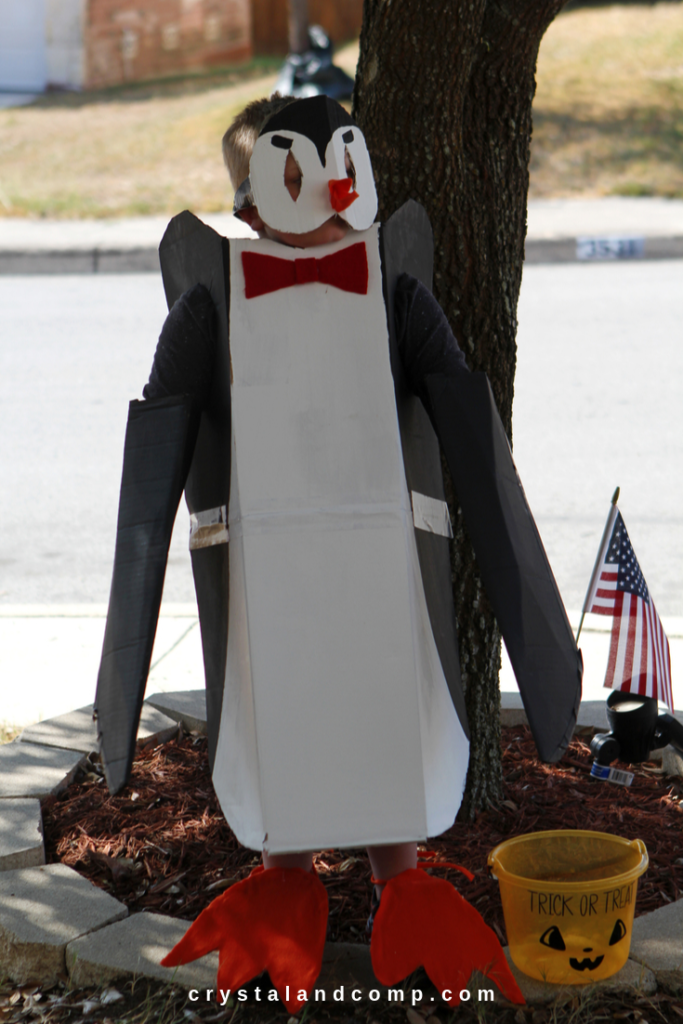
How fun is it to go from this…..
…to this in just about 30 minutes to an hour.
We love this no sew box Halloween Boxtume that we made for under $5! Add this to your list of Halloween costume ideas on the cheap!
Who knew costumes for kids could be made so easily!?!? Luke Henry will have so much fun as he goes trick or treating!
If you are looking for Halloween costumes for women or mens costumes, this same creation can be made by simply using larger boxes that will be appropriately sized for mom or dad! A family of penguins would be a super fun group costume idea for an upcoming Halloween party!
More DIY Halloween Boxtumes
This post is a sponsored post with Amazon. All opinions and ideas are my own.
I think this is the best costume that I’ve seen this year. I’ll be featuring your post on Sunday’s Best. I love it!
Great job, love it! thanks so much for sharing on craft schooling Sunday, great to see you!