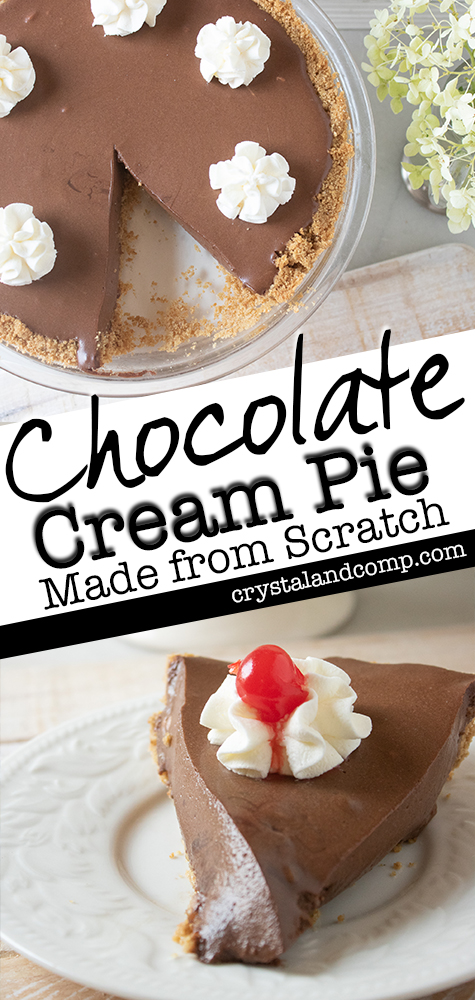
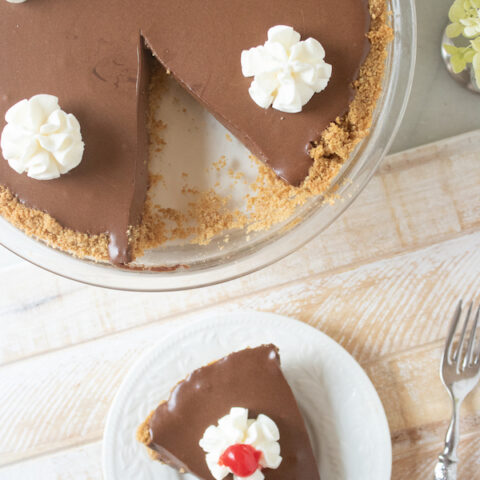
Chocolate Pie Recipe
We also have grandmas chocolate pie recipe if you want to try something with more of a meringue topping.
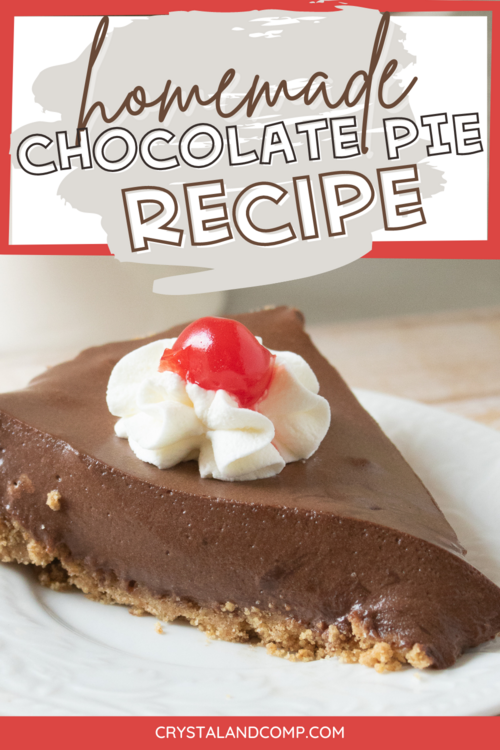
Chocolate Pie with Graham Cracker Crust
What You Need to Make Chocolate Pie with Pudding
Crust
- 1 1/2 cups graham cracker crumbs
- 2 tablespoons sugar
- ¼ cup unsalted melted butter
Pie Filling
- 1 2/3 cup milk, divided
- 1 envelope unflavored gelatin
- 2/3 cup granulated sugar
- 1/3 cup cocoa powder
- 2 tablespoons unsalted butter
- ¾ teaspoons vanilla extract
- ½ cup chilled heavy whipping cream
6 Pack Oven Rack Shields Silicone 14 Inches Oven Rack Protectors with 2 Pack Mini Mitts Heat Resistant Silicone Oven Guards Edge Liner Cover Cooking Pinch Mitts Set Against Burns and Scalds APOPTEX Oven Mitts and Pot Holders Sets, 500℉ Heat Resistant and Food Grade Silicone Gloves with Kitchen Towels, Non-Slip Surface & Recycled Cotton Lining, for Cooking/ Baking/ BBQ (6cps, Grey)

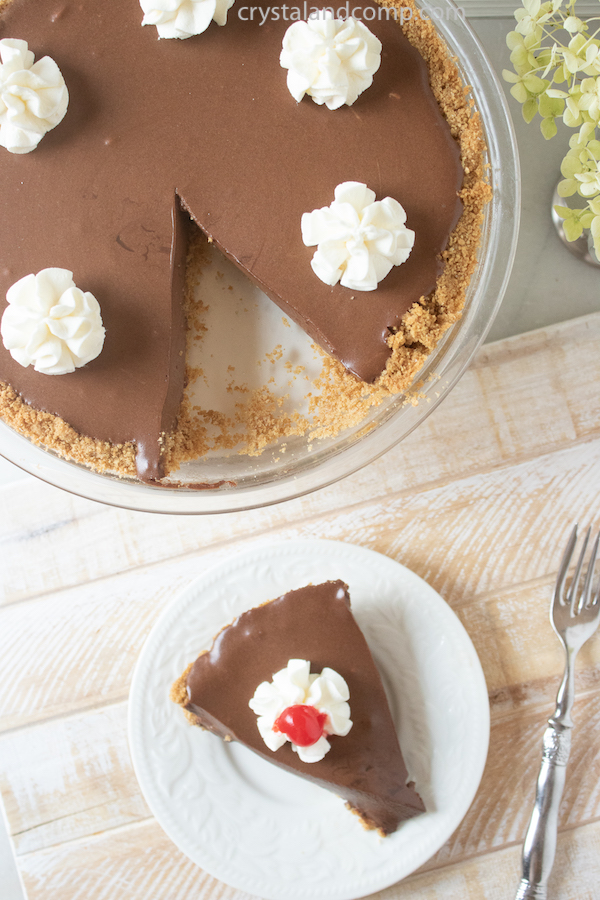
Optional: Dust with dark chocolate cocoa and powdered sugar.
How Long Does Chocolate Cream Pie Last?
If you cover your chocolate cream pie in plastic wrap or put it in an airtight container, you can keep it in the refrigerator for 8-12 days. Don’t leave it on the counter, though, because just that bit of warm room temperature air is enough to melt the filling.
So, keep it in the refrigerator. And enjoy every chilly bite.
Can You Freeze Chocolate Pie?
Yes, you can. And it will keep for 3-5 months with no problems. However, you cannot just toss a chocolate pie off into the ice box. No, this takes a little planning.
First, you can’t freeze the pie in the shell–they defrost at different speeds and it’ll make for a soggy pie crust, so just deal with the filling and make the pie crust when you’re ready to actually eat the pie.
And, because chocolate cream pie is a gelatin type dessert, you have to get ALL of the air out of the container. This means using a vacuum sealer. If you don’t you’ll get ice crystals in your pie and, when it defrosts, it will make the pie all soupy and eww.
So, vacuum seal the filling in a baggie and then freeze. Defrost in your fridge for 12 hours and you’re ready to have a slice!
Why Is My Chocolate Pie Runny? And Can I Fix It?
If your chocolate pie filling is runny, I have good and bad news for you. Good news: it’s not unfixable! You can add a little cornstarch to your filling or a dusting of flour. There’s no guarantees with any pie that it won’t be runny, but adding either of those two to your filling will help it firm right up.
Bad news: the pie still tastes good and you’ll still have to share. LOL!
Kitchen Sign – Rustic Kitchen Decor Sign – Modern Farmhouse Kitchen Decor, Kitchen Wall Decor, Rustic Home Decor, Country Kitchen Decor with Solid Wood Frame 8×17 InchPantry Sign – Rustic Kitchen Sign – Modern Farmhouse Kitchen Decor, Kitchen Wall Decor, Rustic Home Decor, Country Kitchen Decor with Solid Wood Frame 8×17 Inch


More Homemade Pie Recipes
This angel pecan pie recipe is always a crowd pleaser.
I love this apple crisp pie that my friend Kelli makes!
This chocolate raspberry pie is to die for! So stinking good!
And if you love pineapple, you will love this pineapple pie!
Chocolate Pie Recipe
This chocolate pie is smooth and yummy and just like grandma makes!
Ingredients
- Crust:
- 1 1/2 cups graham cracker crumbs
- 2 tablespoons sugar
- ¼ cup unsalted melted butter
- Pie Filling:
- 1 2/3 cup milk, divided
- 1 envelope unflavored gelatin
- 2/3 cup granulated sugar
- 1/3 cup cocoa powder
- 2 tablespoons unsalted butter
- ¾ teaspoons vanilla extract
- ½ cup chilled heavy whipping cream
Instructions
- Preheat the oven to 350 degrees.
- Add the graham crackers to the food processor and crush them fine.
- Once they are finely ground add butter and sugar and combine well.
- Take the mixture and press it evenly into the pie shell and bake in the oven for 10 minutes.
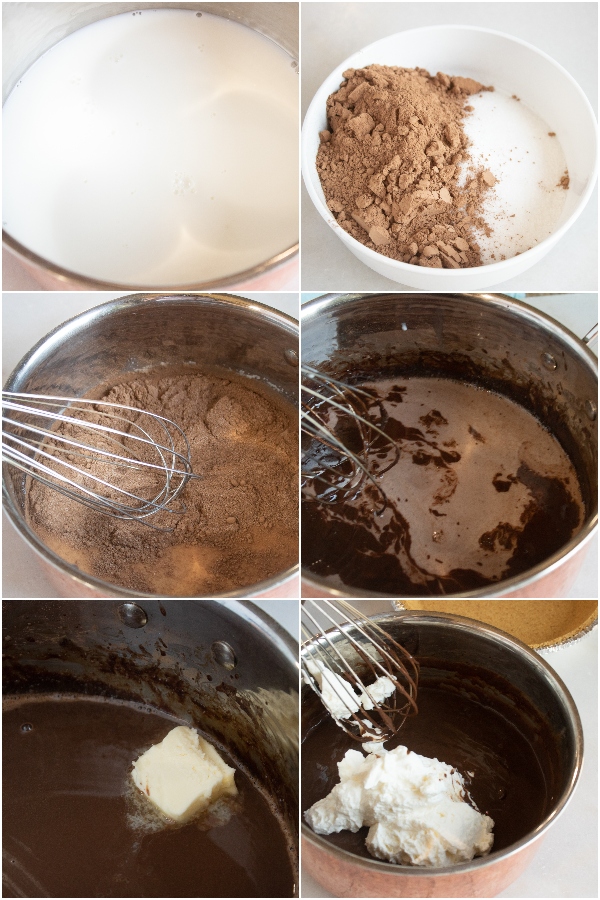
- Add the gelatin and milk to the saucepan and combine. Let things sit for up to 3 minutes.
- Mix the cocoa and sugar in a separate bowl until mixed well.
- Pour the mixture into the gelatin mixture and cook over medium heat stirring constantly until boiling.
- Add in the remaining butter, milk, and vanilla and stir until it is combined.
- Place the mixture in the refrigerator to completely cool and thicken.
- Fold in the whipping cream until the pie mixture and pour it all into the pie crust.
- Refrigerate for 4 hours to set the pie completely.
One Comment