Layered Banana Pudding Cake Recipe
Oh, you have to try this Layered Banana Pudding Cake Recipe—it is absolutely irresistible! Perfect for gatherings or cozy nights. With layers of creamy pudding and fresh bananas, every bite is pure comfort. Plus, it’s surprisingly easy to make at home. Whether for dessert or special occasions, this recipe will surely impress everyone.
If you love dessert recipes that are family friendly and budget friendly, this one is a winner! Sweet and creamy layers, the ingredients are simple and probably already in your pantry. Plus, who doesn’t appreciate a treat that brings everyone to the table?

This recipe can easily be made ahead, saving you time on busy days. It’s desserts like this that keep my family smiling, and giving it a try is highly recommended! Don’t be intimidated by the multi layers. And one of the best things about this recipe is how simple it is to prepare ahead of time, making busy days so much easier!
I love knowing that I can whip it up in the morning or even the night before, and it will still taste just as amazing when it’s time to serve. Honestly, desserts like this are my secret weapon for bringing everyone together. The creamy pudding, sweet bananas, and multiple layers—it always feels like a little love note to my family. Trust me, this one is worth a try and will quickly become a favorite in your home too!
NEED TO SAVE MONEY
ON YOUR GROCERY BILL?

Pudding Recipes You Can Make
Pudding recipes are such a comforting treat, aren’t they? Whether you’re craving a classic Banana Pudding recipe or a show-stopping Layered Banana Pudding, there’s something so nostalgic about every bite.
Each recipe is simple, versatile, and made to bring a little joy to your day. With so many options, it’s impossible not to find a favorite!

Ingredients Needed To Make Layered Banana Pudding Cake Recipe
The ingredients for this recipe come together to create a dessert that’s indulgent, sweet, and absolutely unforgettable. Each ingredient plays a role in making this dessert a delicious centerpiece that looks as amazing as it tastes.
Ingredients Needed:
Cake Ingredients
- French Vanilla cake mix
These create a soft and reliably flavorful base with minimal effort—a must for layering. - eggs
They provide richness and structure to ensure the dessert holds up. - water
Keeps the batter moist and easy to work with. - oil
Adds moisture and a tender crumb for the cake. - toasted coconut
Brings subtle nutty flavor and a slight crunch on top. - caramel sauce
Adds luscious, sweet drizzles for extra flavor. - Nilla wafer cookies
Classic and nostalgic, they add a crunch that pairs beautifully with the pudding.
Banana Pudding Ingredients
- Instant Banana Pudding
Brings that sweet banana flavor effortlessly. - milk
Helps to create the creamy pudding texture. - sweetened condensed milk
Adds extra sweetness and richness to the pudding. - cream cheese
Makes the pudding filling extra smooth and tangy. - Cool Whip
A light, airy addition that complements the pudding filling perfectly.
Vanilla Frosting
- unsalted sweet cream butter
Creates the base for the frosting’s creamy texture. - powdered sugar
Adds sweetness and fluffiness to the frosting. - pure vanilla extract
Enhances the frosting’s flavor with warm, sweet notes. - heavy whipping cream
Makes the frosting dreamy and smooth for spreading or piping.
With these ingredients, you’ll have everything you need to create a layered dessert that’s as stunning to look at as it is to eat!

You can easily tweak this recipe to fit any occasion. Hosting a birthday? Add sprinkles to the frosting for a festive touch. Looking to impress at a dinner party? Add some cherries to the top. For a weeknight family treat, keep it simple and serve as-is—because the flavors truly speak for themselves. You could even switch up the pudding flavor or try using chocolate Nilla wafers for a fun twist. No matter how you serve it, this dessert always feels like a celebration!

Best Tips for Making a Layered Cake
Just because this dessert is gorgeous does not mean it is hard to make. Anyone can do this- trust me! Here are my best tips to help you tackle this.
Have Fun and Be Creative
Whether it’s a special occasion or just because, enjoy the process. Baking a layered dessert is as much about creating memories as it is about making dessert!
Cool It Completely
Always allow your creation to cool fully before assembly. Warm cakes can cause frosting to melt and layers to slide, making the process messy and frustrating.
Use a Leveler or Serrated Knife
Level each cake layer to ensure they’re flat and even. This step prevents lopsided cakes and makes stacking much easier.
Chill Your Layers
If you want to firm up the cake before icing it, refrigerate your cake layers for 30 minutes before assembling. Firm cakes are easier to handle and less likely to crumble during stacking.
Don’t Overfill Between Layers
Apply just enough filling or frosting between layers—it should spread evenly without oozing out the sides when you stack. Less is often more here.
Use a Sturdy Base
Place your cake on a sturdy cake board or plate to make assembly and transport a breeze. A wobbly base can make frosting and decorating tricky.
Apply a Crumb Coat
Spread a thin layer of frosting (called a crumb coat) around the cake to seal in crumbs. You can chill it briefly, then apply the final layer for a polished look.
Use a Turntable for Frosting
A rotating cake turntable makes frosting and decorating much smoother and helps you achieve even, professional-looking results.
Pipe a Border for Fillings
Pipe a ring of frosting around the edge of each layer before adding fillings like pudding or jam. This prevents leakage and keeps your layers stable.
Practice Gentle Pressure
When stacking layers, handle them gently and avoid pressing too hard. Align them carefully for a clean and even look.
Chill Before Final Decoration
Once your dessert is stacked and frosted, chill it for 20–30 minutes before adding decorative touches. This helps the frosting set and ensures clean designs.
Smooth with a Bench Scraper
To achieve smooth sides, use a bench scraper or frosting smoother while spinning your turntable. Start with light pressure and build up for a flawless finish.
Work in a Cool Environment
Avoid assembling and decorating your cake in a warm room—it can soften frosting and make the process harder. A cool kitchen is your best friend!
Take Your Time
Layered treats aren’t a race! Work at a steady pace, and don’t hesitate to pause and refrigerate it if it’s getting to be too soft to handle.

Tips for Using a Turntable When Frosting a Cake
- Start with a Stable Turntable
Make sure your turntable sits firmly on your counter to avoid any wobbling. If needed, place a damp towel underneath to secure it in place. - Center It on the Board
Ensure your dessert is properly centered on the cake board before placing it on the turntable. This helps with even frosting and prevents shifting. - Anchor Board
Use a small dollop of frosting to stick the cake board to the turntable. This keeps the board secure while you’re working. - Work in Sections
Apply frosting one section at a time. Focus on the top first, then move to the sides, spinning the turntable as you work for even coverage. - Use a Smoothing Tool
For professional-looking edges, use an offset spatula or a bench scraper. Hold it steady at a slight angle and spin the turntable with your other hand to smooth out the frosting. - Keep It at Eye Level
Position the turntable so the cake is at eye level. This gives you better control and helps you see any uneven spots while frosting. - Use Light Pressure
Whether you’re spreading frosting or smoothing it, avoid applying too much pressure. Light and steady strokes work best for an even finish. - Clean Your Tools as You Go
Wipe your spatula or scraper clean between turns to avoid dragging crumbs or excess frosting around the cake. - Practice Consistent Spinning
Turn the turntable evenly and at a controlled speed. This allows you to spread or smooth frosting without creating jagged lines. - Experiment with Piping While Spinning
For decorative borders, hold your piping bag steady while gently turning the turntable. This trick helps you achieve consistent designs quickly.
A turntable is a game changer for frosting cakes—it simplifies the process and makes every cake look like a work of art. Enjoy the experience and have fun creating!

How to Properly Store a Layered Banana Pudding Cake
Storing your dessert properly ensures it stays fresh, delicious, and perfectly textured, whether you’re saving it for later or prepping ahead of time. Here’s how to do it:
Short-Term Storage
- Refrigerate Immediately
Since it contains dairy-based pudding, cream cheese, and Cool Whip, it’s crucial to keep it refrigerated. Cover it with a dome or airtight container, or wrap it gently with plastic wrap to protect it from drying out. - Use Wax Paper Between Layers
If you’ve sliced it, place a piece of wax or parchment paper between the cut sections to lock in moisture and prevent sticking. - Storage Timeframe
Your creation will stay fresh in the fridge for 2–3 days. For the best flavor and texture, try to enjoy it within this window.
Long-Term Storage
- Freeze Individual Slices
If you want to freeze it, cut it into individual slices for easy serving later. Wrap each slice tightly in plastic wrap and then in aluminum foil for extra protection. - Freeze It Whole (Optional)
If freezing the entire cake, place it on a sturdy board, wrap it securely with plastic wrap, and then with foil. Be sure to double-wrap to prevent freezer burn. - Defrost Gently
When ready to enjoy, move the slices or the whole dessert from the freezer to the fridge. Allow it to defrost overnight for even thawing, and always serve it chilled. The texture will remain creamy and delicious! - Storage Timeframe
Properly frozen, the Layered Banana Pudding Cake can last up to 1–2 months in the freezer without compromising taste.
Additional Tips to Preserve Freshness
- Keep It Covered
Whether refrigerating or freezing, always keep it covered to avoid absorbing other food odors from your fridge or freezer. - Avoid Heat and Direct Light
Store it in a cool spot in the fridge away from warm spots like the fridge door. This helps maintain the pudding and frosting’s stability. - Handle with Care
When taking it in and out of the fridge, work gently to preserve its beautiful layers and decorations.
With these storage tips, your creation will taste as good as the moment you made it, whether it’s served tomorrow or weeks from now!

Why should you use Amazon to buy baking tools and supplies?
When it comes to finding the perfect baking tools and supplies, Amazon is a baker’s dream destination. Amazon provides endless variety, convenience at your fingertips, you can see trusted customer reviews and easily find the best pricing! Here are some items that you will need for today’s cake making.
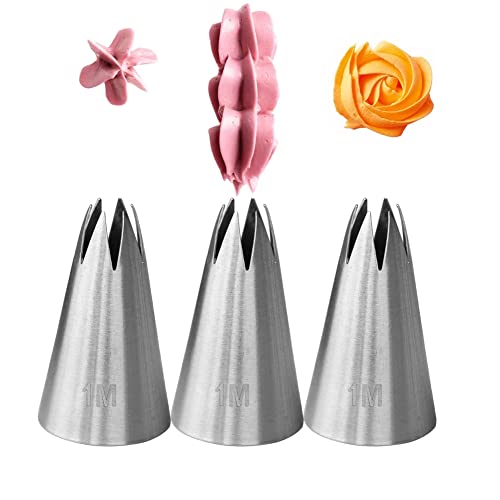
Mainstays 9 Inch Round Cake Pan, 3 Pack Paremmin 10inch Round Cake Boards 1/2inch Thick, Pack of 1 – Sturdy Silver Drums with Smooth Straight Edges, Waterproof & Oil-Proof for Baking, Cakes, Pizza, and Desserts (10inch)PROKITCHEN, Cake Slicer Leveler for Even Layers, Adjustable Cake Leveler 2-Wire, Cake Leveler & Slicer Cutter Cake Cutter Slicer Leveler Cake Layer Cutter for Leveling Top of Layer, Cakes Baking ToolsRestaurantware 12 Ounce Condiment Squeeze Bottle 1 With Lid Plastic Squeeze Bottle – Precison Dispensing Tip Flexible Clear Plastic Squeeze Bottle For Sauces For Sauces Spreads Or Condiments16 Inch Piping Bags Disposable, 100Pcs Large Pastry Bags, Frosting Bags, Cake Decorating Bags, Decorating Bags Large Piping Bags, Decorating Bags1M Piping Tip for Cake Decorating,Seamless Icing Tips,3 Pcs Decorating Tips,Open Star,Stainless SteelKasmoire 3Pcs 1M Piping Tips,Stainless Steel 1M Star Tips for Piping,Seamless Icing Tips With 10Pcs Disposable Piping Bags for Cake Decorating


Whether you’re a beginner baker or a seasoned pro, Amazon combines convenience, affordability, and a vast selection to make it easier than ever to stock your kitchen with everything you need. Happy baking!
Creative Ways to Customize a Layered Cake
You can make this recipe exactly as we share in the instructions, or you can give it a fun and more custom twist. Here are some of my favorite ideas.
- Switch Up the Pudding Flavor
Swap the banana pudding for vanilla, chocolate, or even butterscotch pudding to create a new flavor profile while still keeping it creamy and delicious. - Add Fresh Fruit Layers
Include layers of fresh strawberries, blueberries, or raspberries between the cake layers for a burst of color and juicy sweetness. - Infuse It with Flavor
Brush the cake layers with a simple syrup flavored with vanilla, rum, or coconut to add an extra layer of moisture and depth. - Experiment with the Frosting
Replace the vanilla frosting with chocolate or cream cheese frosting for a richer taste or add a few drops of banana or coconut extract for an intensified flavor. - Try Different Cookies
Instead of Nilla wafers, use crushed Oreos, graham crackers, or shortbread cookies to add a unique crunch to your dessert. - Caramel Drizzle Variations
Swap the caramel sauce for chocolate ganache, strawberry syrup, or even dulce de leche for a personalized topping twist. - Customize the Toppings
Top it with shaved chocolate, colorful sprinkles, candied nuts, or edible glitter to match the theme of your celebration. - Make It a Chocolate-Banana Cake
Add a layer of cocoa powder or melted chocolate to one of the cake layers for a rich, chocolatey surprise. - Transform It Into a Tropical Delight
Add shredded pineapple between the layers, swap the toasted coconut for sweetened coconut flakes, and sprinkle the frosting with lime zest. - Decorate With Edible Flowers
Use edible flowers like pansies or marigolds to give the cake an elegant, garden-inspired look perfect for weddings, showers, or spring gatherings. - Play with Shapes and Sizes
Instead of a traditional round cake, try making this recipe into a mini, a sheet cake, or even cupcakes—perfect for portioned treats. - Layer It with Colors
Tint the frosting or pudding in different pastel shades to create a colorful display when the cake is sliced. This works great for birthdays or themed parties. - Make It a Cookie Sandwich Cake
Add a thick layer of cookie butter or peanut butter between the layers alongside the banana pudding for an extra indulgent twist. - Personalize for a Holiday Theme
For Christmas, decorate the frosting with red and green sprinkles. For Halloween, add black and orange accents. The possibilities are endless by simply changing the decor!
This dessert is like a blank canvas, ready to take on any creative twist you can dream up. Have fun experimenting and making it your own masterpiece!

Recipes Using Banana
Before you go, don’t miss out on these delightful banana-inspired recipes that are bursting with festive charm and incredible flavors. Whether you’re looking for crowd-pleasing desserts or eye-catching centerpiece treats, these recipes are sure to make any celebration unforgettable.
Each recipe is crafted to bring joy and a touch of magic to your table. Whip them up, share them with loved ones, and create sweet memories that will make your gathering truly special!

Layered Banana Pudding Cake Recipe
Ingredients
Cake Ingredients
- 2 boxes of French Vanilla cake mix
- 6 eggs
- 2 C water
- 1 C oil
- 2 C toasted coconut
- 1 bottle of caramel sauce
- Nilla wafer cookies
Banana Pudding Ingredients
- 1 3.4-oz. box of Instant Banana Pudding
- 2 C. of milk
- 1 can sweetened condensed milk
- 1 8-oz. package cream cheese, softened
- 1 container Cool Whip
Vanilla Frosting Ingredients
- 3 C unsalted sweet cream butter, softened
- 6 C powdered sugar
- 3 tsp pure vanilla extract
- 5-7 tbsp heavy whipping cream
Instructions
Cake Directions
- Preheat your oven to 350°F. Spray three cake pans with Pam baking spray.
- Prepare the cake batter according to the instructions on the back of your cake mix box.
- Evenly divide the batter into the three prepared pans.
- Bake for 25-30 minutes, or until a toothpick inserted into the center comes out clean.
- Once baked, allow the cakes to cool completely.
- Use a cake leveler to slice off any rounded tops to create flat, even layers.
Banana Pudding Directions
- In a large mixing bowl, beat together banana pudding mix and milk for about 5 minutes.
- Add the sweetened condensed milk and mix until smooth.
- Mix in the cream cheese until well combined and smooth.
- Gently fold in the Cool Whip until smooth and fluffy.
- Scoop the pudding mixture into a piping bag and set aside.
Frosting Directions
- Using a stand mixer, beat together all the frosting ingredients until creamy and stiff peaks form.
- Scoop the frosting into a separate piping bag and set aside.
Cake Assembly Directions
- Place the first cake layer onto a cake board.
- Pipe a thick outline of frosting around the edge of the cake layer. This will act as a barrier for the pudding filling.
- Pipe the banana pudding into the center of the cake layer, staying within the frosting barrier.
- Add the second cake layer on top of the first.
- Repeat the frosting and pudding steps with the second layer.
- Place the third cake layer on top.
- Use the remaining frosting to frost the entire cake, smoothing it out evenly.
- Sprinkle toasted coconut around the bottom edge of the cake.
- Fill a squeeze bottle with caramel sauce, and gently drizzle it along the top edge of the cake, allowing it to drip down the sides.
- Using the remaining frosting, pipe dollops along the top of the cake.
- Sprinkle the dollops with toasted coconut and press a Nilla Wafer cookie onto each dollop of frosting.
- Place the finished cake in the fridge for 1 hour to allow the frosting to set.
Slice, serve, and enjoy!
Notes
Tools You Need:
3 (9inch round) cake pans
1 (10 inch) round cake board
1 cake leveler
1 Squeeze bottle
1 disposable piping bag
1 large piping bag with a large star tip