Grasshopper Pie Recipe
This Grasshopper Pie Recipe is not just a dessert; it’s a nostalgic trip down memory lane, evoking the classic taste of the iconic cocktail that inspired its name. This no-bake pastry marries creamy textures with a vibrant green hue, making it a stunning centerpiece for any gathering. Using a convenient pre-made Oreo crust, you’ll save time in the kitchen while still impressing your guests with a luscious filling made from fresh mint leaves, velvety cream cheese, and whipped heavy cream. The subtle sweetness of chocolate chips adds the perfect finishing touch, while a few drops of green food coloring transform this treat into a visual delight.
Treating yourself to something sweet is always a joy, and Easy Dessert Recipes make it super simple to whip up a tasty treat without wasting hours in the kitchen.

You don’t need complicated recipes to make a delightful dessert; often, the simplest ingredients come together to create the best flavors, delighting your guests or just making your day a little sweeter!
Mouthwatering Pie Recipes
Mouthwatering sweet recipes are all about bringing together fun flavors and textures, making them perfect for any occasion! Whether you’re in the mood for fruity fillings like apple or berry, or craving something creamy like chocolate or custard, there’s definitely a recipe out there to satisfy your cravings.
- Easy Whiskey Pie Recipe
- Sweet Potato Chocolate Pie Recipe
- Mississippi Mud Pie Recipe
- Peanut Butter Toffee Pie Recipe

Grasshopper Mint Pie
Indulge in this simple and delicious Grasshopper Pie recipe with a pre-made Oreo crust, fresh mint leaves, heavy cream, cream cheese, and chocolate chips.
Ingredients
Pie Shell:
- 1 Pre Made Oreo Crust
Pie Filling:
- 1 Cup Minced Mint Leaves, stem removed
- 2 Cups Heavy Cream
- 3-4 Drops Green Food Coloring
- 8 Ounces Cream Cheese, room temperature
- 1 Teaspoon Vanilla Extract
Ganache Ingredients:
- 1 Cup Chocolate Chips
- ½ Cup Heavy Cream
Instructions
To make the pie:
- Coarsely chop mint leaves, removing stems.
- In a small saucepan add the mint leaves and cream, simmer over medium to high heat. Simmer for 5-7 minutes.
- Remove from the heat and set to the side for 1 hour.
- Pour the mint cream mixture through a strainer into a bowl and refrigerate for 1 hour until cold.
- In a large bowl add the cream cheese to the mint cream and use an electric mixer to mix until stiff peaks form.
- Add green food coloring and vanilla and mix until combined. Pour into pie crust and chill for 4-5 hours.
- Remove the pie from the refrigerator and pour the room temperature chocolate ganache on top of the pie.
- Place back in the refrigerator for 2 hours. Garnish with mini chocolate chips.
For the Ganache:
- In a medium saucepan over medium heat add the chocolate chips and heavy cream. Whisk until fully combined and melted.
- Remove from heat and allow to cool before using.
Ingredients Needed for this Mint Dessert
Here’s what you need to make this minty treat:
- Pre Made Oreo Crust – This crust is super convenient and delicious. You skip the baking, which is a real time-saver, especially if you’re busy. The rich chocolatey flavor of the Oreo crust pairs perfectly with the creamy mint filling, making every bite a treat.
- Minced Mint Leaves – Their fresh and invigorating flavor really makes a difference, giving the pastry that natural minty essence that sets it apart from those artificial flavorings. When you finely chop the leaves, they blend right into the creamy filling, adding a delightful burst of flavor with every bite.
- Heavy Cream – It gives the dessert that luxurious, velvety texture that makes it so hard to resist. Thanks to its high-fat content, it whips up into stiff peaks, creating a light and airy mousse-like consistency that pairs perfectly with the rich mint and chocolate flavors.
- Green Food Coloring – Green food coloring gives the dessert that vibrant green color that not only makes this dessert look amazing on any dessert table but also hints at the refreshing minty flavor inside.
- Cream Cheese – Cream cheese has a rich, creamy texture and mild tangy flavor. These qualities make it a perfect base for mixing with fresh mint, creating a smooth and delicious consistency that works well with the other ingredients.
- Vanilla Extract – Its rich, aromatic quality adds depth, blending the fresh mint and rich chocolate with just the right touch of sweetness. The complexity of vanilla works perfectly with the creamy base, balancing the coolness of the mint.
- Chocolate Chips – The rich, bittersweet chocolate pairs so nicely with the cool, minty filling, creating that classic mint-chocolate combo we all love. When you sprinkle them on top, they add a great crunch that contrasts beautifully with the smooth, creamy filling.
Fridge Organization
This delightful combo of mint and chocolate with this easy-to-make treat, where each ingredient brings together a medley of flavors that are sure to impress. With minimal prep time and maximum taste, this refreshing dessert is perfect for any occasion, promising to be a hit with every bite!

Baking Essentials at Amazon
Check out the great selection of Baking Essentials on Amazon! Whether you’re a newbie or a seasoned pastry chef, there’s something for everyone. From top-notch bakeware to must-have kitchen gadgets, Amazon has all the tools you need to whip up delicious homemade treats easily.
HOTEC Food Grade Silicone Rubber Spatula Set for Baking, Cooking, and Mixing High Heat Resistant Non Stick Dishwasher Safe BPA-Free Multicolor Set of 5 Pyrex 3PC Glass, 1 Cup, 2 Cup, 4 Cup, 3 PC Measuring Cup SetKitchenAid Ribbed Soft Silicone Oven Mitt Set, 7Umite Chef Mixing Bowls with Airtight Lids Set, 8PCS Stainless Steel Khaki Nesting Bowls with Grater Attachments, Kitchen Bowls with Non-Slip Bottoms, Size 5, 4, 3.5, 2, 1.5QT for Mixing & ServingAmazon Basics 6 Piece Nonstick, Carbon Steel Oven Bakeware Baking Set, 40.5 cm x 28.5 cm x 15 cmPyrex Glass, 3-Piece, 3 PC Mixing Bowl Set


Can I Use a Homemade Crust Instead of a Pre-Made Oreo Crust?
If you’re feeling like getting a bit personal with your dessert, you can totally whip up a homemade crust instead of using a pre-made Oreo one. Making your own Oreo crust is super easy! Just crush up some Oreo cookies until they’re nice and crumbly, mix them with melted butter, and press that into your dessert dish.

If you want, you can pop it in the oven for a few minutes to set, or just chill it in the fridge before adding your yummy mint filling. This way, you get to decide how thick and textured your crust is, which gives your minty dessert that extra burst of freshness and flavor!
How Can I Ensure a Smooth and Creamy Texture for the Filling?
To get that smooth and creamy texture for your filling, it all starts with using high-quality ingredients and mixing them the right way. First off, whip your heavy cream until you have stiff peaks—this will really add some lightness and airiness to your mix. Make sure your cream cheese is at room temperature to prevent any lumps; nobody wants that!

Slowly blend in the minced mint leaves and vanilla extract until it’s all velvety. When you’re ready to combine everything, gently fold the whipped cream into the cream cheese mixture instead of stirring it too hard. This way, you’ll keep that fluffiness and avoid deflating it. And if your filling ends up feeling a bit too dense, just fold in a little more whipped cream to get that perfect smooth consistency. Enjoy!
What is the Best Way to Store this Dessert?
To ensure your creation stays fresh and delicious, proper storage is key. Once this is prepared, cover it with plastic wrap or foil to prevent it from absorbing any unwanted odors from the fridge. Store it in the refrigerator for up to 3 days to maintain its texture and flavor. If you need to prepare it in advance or have leftovers you’d like to keep for a longer period, consider freezing it.

Before freezing, wrap it tightly with plastic wrap and then cover with aluminum foil or place it in an airtight container. You can freeze this for up to 1 month. When you’re ready to enjoy it, simply thaw it in the refrigerator overnight. This method of storing ensures that your dessert remains as fresh and flavorful as when you first made it.
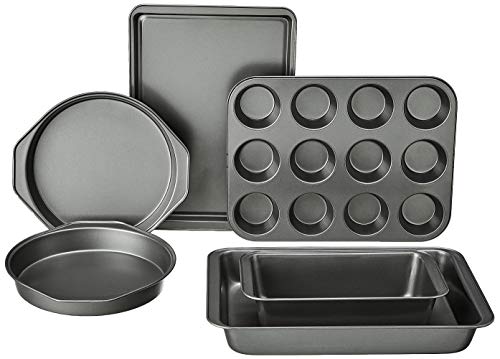
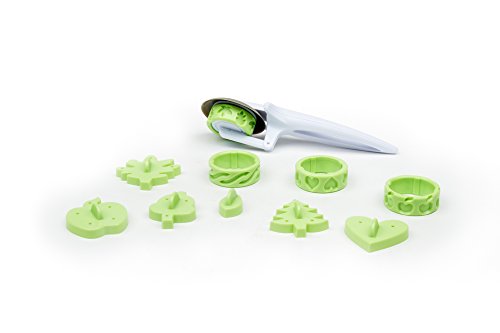
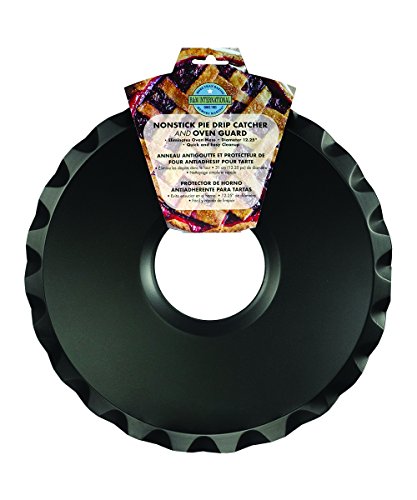
Pie Making Essentials at Amazon
Check out the awesome dessert making essentials on Amazon! They’ve got everything you need to level up your baking game, from top-notch rolling pins to non-stick pans. You’ll be whipping up delicious treats in no time!
Webake Pie Crust Protector Shield Adjustable Pie Crust Shield Fits 11.5-9 Inch Pie Pan, European Food Grade Silicone Pinch Test Passed, for Baking Party Pie Tart, Pack of 2, Red and GreyDough Presser Pocket Pie Molds, Party Potluck Hand Pie Molds, Hand Pie Molds, Apple, Pumpkin And Acorn Shapes 3-Piece (Round Pie Mold)Silicone Baking Mat, Non Stick Pastry Mat Sheet for Dough Rolling, Nonslip Fondant/Pie Crust Mat, Counter Mat Oven Liner Mat for Making Cookies Macarons Bread Baking Supplies Extra Large 26 x 16 InchNorpro Lattice Mini Pie Mold, 4.5Fox Run Pie Top Cutters and Decorating Kit, 11-Piece Set, GreenR&M International Non-Stick 12.25


Chocolate Pie Recipes
Chocolate dessert recipes are such a delicious treat for anyone who loves chocolate! They mix rich cocoa flavors with a smooth, creamy texture that just melts in your mouth. Whether you’re a fan of classic chocolate silk desserts or you prefer an indulgent chocolate mousse, these recipes strike the perfect balance of sweetness and richness, making them great for any occasion!