Rainbow Chocolate Chip Cookie Recipe
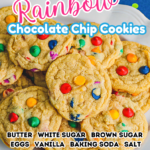
Who doesn’t love sweets? This Rainbow Chocolate Chip Cookie Recipe will be enjoyed by kids and adults alike. With colorful morsels scattered throughout, these treats are so cheerful! Perfect for birthdays, parties, or just a fun afternoon treat, they are made easily. Plus, the recipe is simple to follow and uses pantry staples.
Sometimes, baking can feel overwhelming, but don’t worry—we all start somewhere. Easy dessert recipes like these are beginner-friendly yet so impressive. Plus, they’re perfect for involving your kids since mixing colorful treats is always a hit. Your kitchen will smell amazing, and the cleanup is manageable, I promise!

I also want to add that baking doesn’t have to break the bank or be a hassle, especially with this recipe! Using simple, affordable ingredients, it’s budget-friendly and stress-free. Whether it’s a weekend treat or an after-dinner surprise, these sweet treats are as easy on your wallet as they are to make.
Rainbow Recipes
If you love all things colorful and cheerful, you’re going to adore the rainbow recipes we’ve got for you! Whatever you choose, these recipes are easy to make, family-friendly, and guaranteed to bring a smile to your table!
NEED TO SAVE MONEY
ON YOUR GROCERY BILL?

We have tons of rainbow recipes here on my site that are super fun to make!

Ingredients Needed To Make This Rainbow Chocolate Chip Cookie Recipe
To make this recipe, you’ll need a handful of simple ingredients that pack in flavor, texture, and color. Each item plays a key role in creating end results that are soft in the center, slightly crisp on the edges, and filled with bursts of rainbow sweetness. These ingredients are kitchen staples, making this recipe both approachable and fun for everyone in the family.
Ingredients and Their Significance
- butter, softened
Butter is the secret to rich and tender cookies. When softened, it creams beautifully with sugar for a smooth dough. - white sugar
White sugar gives them their slight crunch and sweetness, balancing the flavors. - brown sugar
Brown sugar adds a deeper caramel flavor and keeps them soft and chewy. - eggs
Eggs provide structure and moisture, helping them rise and hold their shape. - vanilla extract
Vanilla enhances the flavor, providing a warm, comforting undertone. - baking soda
Baking soda acts as a leavening agent, helping them rise slightly while baking. - hot water
Dissolving baking soda in hot water ensures even mixing, preventing any dense, uneven spots in the dough. - salt
Salt balances the sweetness and enhances the overall flavor. - all-purpose flour
All-purpose flour gives the cookies their structure while keeping them tender. - rainbow chips
These colorful chips make the end result fun and add bursts of chocolatey goodness in every bite.
When these ingredients come together, they create a dessert that’s truly special. The butter and sugars blend to form a perfectly creamy base, while the eggs and vanilla give it that homemade taste we all love. The baking soda and flour ensure they bake to the ideal texture, and the rainbow chips? They’re the star of the show, adding both color and flavor to make every bite unforgettable. This recipe combines fun, simplicity, and deliciousness into one perfect treat your whole family will adore!

Tips for Perfect Baked Cookies
Baking treats like these can feel like both a science and an art, but don’t worry—we’ve all been there! Whether you’re baking with little helpers or just sneaking in some quiet kitchen time, getting that perfect batch is easier than you think. With a few simple tricks, your treats will turn out soft, chewy, and absolutely irresistible every time. Let’s talk about tips that will have your kitchen smelling heavenly and your family eagerly reaching for seconds!
- Use Room-Temperature Ingredients
Cold butter and eggs can mess up the texture, so take them out of the fridge an hour before baking. - Measure Accurately
Baking is science, so don’t eyeball those measurements. Use measuring cups and spoons for precise amounts. It makes a big difference! - Don’t Overmix the Dough
Once you combine the dry and wet ingredients, stop mixing! Overmixing can turn your cookies dense instead of soft. - Chill Your Dough
If your cookies tend to spread too much, pop the dough in the fridge for 30 minutes. This helps them hold their shape. - Line Your Baking Sheets
Use parchment paper or a silicone baking mat. Not only does it prevent sticking, but it makes cleanup so much easier. - Space Them Out
Give your treats room to spread on the baking sheet. Overcrowding leads to one giant dessert (unless that’s what you’re going for!). - Bake One Tray at a Time
For the most even bake, try baking one cookie sheet at a time right in the center of the oven. - Watch Like a Hawk
Cookies can go from perfect to overdone in seconds. Set a timer, and check them a minute or two earlier than you think. - Cool Properly
Allow them to cool on the baking sheet for a few minutes before transferring them to a rack. They’ll firm up as they cool. - Taste-Test Often
This one’s for the kids (and the mom, of course). A little taste of dough or fresh-from-the-oven treat keeps things fun!
Follow these tips, and you’ll have the perfect results every time. Soft, chewy, colorful, and oh-so-delicious cookies are just a few simple steps away!

Why is it best to use room temperature ingredients when baking homemade cookies?
Using room temperature ingredients when baking this recipe is one of those little secrets that can make a big difference. When your butter, eggs, and other ingredients are at the same temperature, they mix together better and more evenly. Think about softened butter, for example. It blends smoothly with sugar, creating that light and fluffy base for your cookie dough. If the butter is too cold, it won’t cream properly, leaving you with uneven dough. The same goes for eggs! Cold eggs can stiffen the dough, making it harder to mix, and they won’t distribute as easily.
Room temperature ingredients also help make your treats bake more evenly. If your dough is mixed smoothly, they will spread just right in the oven, giving you that perfect balance of crispy edges and soft, chewy centers. It’s a small step, but it makes a big impact. Trust me, taking a little extra time to warm up your ingredients is so worth it!

The Best Flour for Baking Cookies and Why It Matters
The type of flour you use is key to achieving the perfect texture and taste. You might think flour is just, well, flour, but it turns out, not all flours are created equal! Choosing the right type can make the difference between a soft, chewy end results or dry or crumbly.
All-Purpose Flour Is Your Best Friend
For most cookie recipes, all-purpose flour is the go-to choice. It’s called “all-purpose” for a reason! This type of flour has a balanced protein content (usually around 10-12%), which is perfect for creating a nice structure without making them too stiff. The result? Soft and chewy insides with lightly crisp edges. Whether you’re making classic chocolate chip or sugar , all-purpose flour gives you consistent and delicious results every time.
Want Softer Cookies? Try Cake Flour
If you’re after super-soft end result that almost melt in your mouth, cake flour is worth a try. With a lower protein content (about 7-9%), this flour is finer and lighter, giving them a tender, delicate texture. For example, if you love gooey cookies, swapping some all-purpose flour for cake flour can bring you pillowy results.
Bread Flour for Extra Chewy Cookies
On the other hand, bread flour can create that bakery-style chew. With a higher protein content (12-14%), bread flour builds more gluten, which gives your treats a little more “stretch” and chewiness. This is a great option for recipes like peanut butter or oatmeal treats, where a hearty texture really shines.
Whole Wheat Flour for a Nutty Twist
Looking to add a unique flavor and a touch of healthiness? Whole wheat flour is a fun choice. It has a slightly nutty flavor and works well in recipes where a little extra texture complements the ingredients, like in oatmeal raisin or chocolate chunks. However, because whole wheat flour absorbs more liquid, your treats might turn out drier, so consider using half whole wheat and half all-purpose to keep the balance.
Why Does Flour Choice Matter?
Flour isn’t just a filler in your recipe. It has a big impact on your treats’ texture, flavor, and structure. All flours contain protein, which develops into gluten when combined with liquid and mixed. The amount of gluten in your dough determines how your dessert will form and bake. For example, more gluten creates a denser, chewy cookie, while less gluten results in a softer or crumblier one.
No matter what flour you choose, remember the real magic happens when you combine it with love!

Why did my cookies spread too much?
Oh, the heartbreak of watching cookies flatten into puddles in the oven! If your cookies seem to be spreading more than they should, don’t worry, we’ve all been there. The good news is, it’s a problem with easy fixes! Here are some common culprits behind overly spread cookies and simple tips to ensure they bake up just right next time.
1. Your Butter Might Be Too Soft (or Melted)
Soft butter is great, but if it’s too soft (or even melted), your cookie dough will likely lose its structure. This is because overly warm butter can cause the dough to spread too fast when it hits the oven.
How to fix it:
Make sure your butter is softened but still holds its shape. A good rule of thumb? Aim for butter that’s cool to the touch but soft enough to press a finger into. If your kitchen is warm, pop your dough in the fridge for 20-30 minutes before baking. This will firm it up and help your cookies keep their shape.
2. Too Much Sugar
Sugar doesn’t just add sweetness; it also affects the texture of your cookies. If there’s too much sugar in your dough, the cookies can spread more as the sugar melts during baking.
How to fix it:
Stick to the recipe’s measurements! If you tend to eyeball ingredients, consider leveling out your sugar in measuring cups. If you’re experimenting with a recipe, try cutting back on sugar just slightly for less spreading.
3. Not Enough Flour
Flour gives structure to your cookies, so if your dough is light on flour, they’ll likely spread out too much. This happens a lot when flour is measured incorrectly (like scooping with the measuring cup instead of spooning and leveling).
How to fix it:
Measure your flour accurately. Spoon flour into your measuring cup, then level it off with a knife. Too lazy for that? I get it! A kitchen scale is an easy and foolproof way to make sure you’re using the right amount.
4. Skipping the Chill Time
If you’re in a rush, it’s tempting to skip chilling dough—but warm dough is a big reason why cookies spread too much. When the butter or fat is warm, the cookies spread faster in the oven before they have time to set.
How to fix it:
Be patient and chill your dough! Even a quick 10-15 minutes in the fridge can make a huge difference. For thicker cookies, chill the dough for at least an hour.
5. The Baking Sheet Is Warm
Ever toss a second batch of dough onto a still-warm baking sheet? This can cause cookies to melt and spread before they even get to baking properly.
How to fix it:
Always use a cool, clean baking sheet for each batch. If you’re reusing a sheet, give it time to cool completely or run it under cold water and dry it before starting the next round.
6. Your Oven Temperature Isn’t Accurate
Oven temperature matters a lot when baking. If your oven runs cooler than it should, cookies will take longer to set, giving them more time to spread.
How to fix it:
Invest in an inexpensive oven thermometer to double-check your oven’s accuracy. If it’s off, just adjust the dial to hit the right temperature.
7. Over-creaming Your Butter and Sugar
When you cream butter and sugar, you’re incorporating air into the dough. While that’s usually good, overdoing it can trap too much air, leading to cookies that spread out thin in the oven.
How to fix it:
Cream your butter and sugar just until light and fluffy, usually about 2-3 minutes. There’s no need to whip it into oblivion!

What is the best sugar to use when you’re making cookies?
If there’s one thing we can agree on, it’s that sugar is what makes your dessert taste heavenly! But did you know that the type of sugar you choose can totally change the texture, flavor, and even the look of your treats? Choosing the right sugar is like giving your cookies their personality! Here’s a breakdown of the most common types of sugars and how they affect your sweet treats.
White Sugar: The Classic Choice
White granulated sugar is a staple in most recipes, and for good reason. It’s what gives them their crisp edges and lighter texture. White sugar absorbs less moisture than other sugars, which means your treats come out thin and crisp.
Brown Sugar: For Richness and Chew
Brown sugar is white sugar with molasses added back in, which gives it its rich color and slightly caramel-like flavor. The moisture from the molasses also makes treats softer and chewier. If you love gooey chocolate chip cookies, you have brown sugar to thank.
- Light brown sugar is milder and works well in most recipes.
- Dark brown sugar has more molasses, adding extra depth and chewiness. Perfect for oatmeal or molasses treats!
Pro tip: If you want your cookies to stay softer longer, you can swap some or all of the white sugar for brown sugar.
Powdered Sugar: Delicate and Tender
Powdered sugar (or confectioners’ sugar) is super fine and often has a bit of cornstarch mixed in to prevent clumping. This sugar creates a much lighter, tender texture, making it ideal for recipes like shortbread ortreats you plan to ice. Because it dissolves quickly, powdered sugar won’t give you that same caramelized crunch you get from granulated sugar. Think delicate, melt-in-your-mouth treats!
Turbinado or Raw Sugar: For a Crunchy Twist
Turbinado sugar, often called raw sugar, has larger crystals and a mild molasses flavor. It’s not typically used as the main sugar in the dough since it doesn’t dissolve as easily, but it makes a fantastic topping! Sprinkle it on them before baking for a fun, crunchy texture and a touch of sparkle. It’s especially pretty on snickerdoodles or sugar cookies.
Coconut Sugar: A Natural Alternative
Coconut sugar is a great choice for those looking for something less processed, with a subtle caramel flavor. It behaves similarly to brown sugar in cookies, giving them a soft, slightly chewy texture. Just note that it’s not as sweet as regular sugar, so your end results might taste a bit less sugary.
Why Sugar Choice Matters
Sugar isn’t just for sweetness. It plays a big role in how cookies spread, brown, and even feel when you bite into them. Granulated sugar encourages spreading, while brown sugar’s moisture and acidity slow it down. That’s why many recipes use a mix of both—to balance texture and flavor.
If you’re feeling adventurous, try experimenting with different ratios or even substituting part of one sugar with another. You might just discover your new favorite texture or flavor!

No Fail Cookie Recipes
If you want even more ideas before you head off to bake, here are some more tried-and-true ideas. All of these ideas are simple, delicious, and guaranteed to impress.
No matter which recipe you choose, these cookies are sure to bring smiles to your friends and family. They’re the perfect treats for any occasion—or just because you deserve something sweet!

Rainbow Chocolate Chip Cookie Recipe
Ingredients
- 1 cup butter, softened
- 1 cup white sugar
- 1 cup packed brown sugar
- 2 eggs
- 2 teaspoons vanilla extract
- 1 teaspoon baking soda
- 2 teaspoons hot water
- ½ teaspoon salt
- 3 cups all-purpose flour
- 2 cups rainbow chips
Instructions
- Preheat your oven to 350°F and line a large baking sheet with parchment paper for easy cleanup.
- In a large mixing bowl, cream together the butter, sugar, and brown sugar until the mixture becomes light and fluffy.
- Add the eggs and vanilla extract, then continue to beat for another 2 minutes to fully incorporate the ingredients.
- Dissolve the baking soda in hot water, then stir it into the batter.
- Gradually mix in the flour and salt, combining until the dough is smooth and well blended.
- Gently fold the rainbow chips into the dough to evenly distribute them.
- Use a cookie scoop to portion out the dough, placing each scoop onto the prepared baking sheet, leaving space between them.
- Bake the cookies in the preheated oven for 8 to 10 minutes, or until the edges look set.
- Remove the cookies from the oven and allow them to rest on the baking sheet for about 2 minutes before transferring them to a wire rack to cool completely.
- Once cooled, store the cookies in an airtight container at room temperature for up to one week.
Notes
To freeze the cookie dough:
- Prepare the dough according to the recipe instructions.
- Use a cookie scoop to portion the dough and place the scoops onto a parchment or wax paper-lined baking sheet.
- Freeze the dough balls on the baking sheet until they are solid.
- Once frozen, transfer the dough balls into an airtight freezer-safe container.
- Store the cookie dough in the freezer for up to 6 months.